Sowing carrot seeds can be tricky—they’re tiny, slow to germinate, and often end up clumped together, leading to overcrowding and weak growth. That’s where cornstarch gel comes in! This clever gardening trick helps distribute seeds evenly, keeps them moist for better germination, and eliminates the need for excessive thinning later on.
If you’ve ever struggled with patchy carrot rows or wasted seeds, using a cornstarch gel might be the game-changer you’ve been looking for. In this article, we’ll explore why some growers swear by this method and how you can try it yourself for a more successful carrot crop.
Why This Could Help?
Carrots need constant moisture to sprout, and since they take up to three weeks to germinate, keeping the soil constantly damp can be a challenge - and if you miss just one day when the sun is out and the ground dries up quickly, that could be your crop ruined.
The gel locks in moisture around the seeds, giving them the best chance to grow strong and healthy. Plus, it stops those little seeds from washing away when you water—keeping them exactly where you planted them.
It’s also easy to go overboard when sprinkling tiny carrot seeds, which means extra work thinning them out later (and an increased carrot fly risk). With the gel method, you get better spacing, better germination, and an easier planting process from start to finish. Give it a try, and you’ll be growing neat, healthy carrot rows with way less effort!
How to sow Carrots in a Cornstarch gel
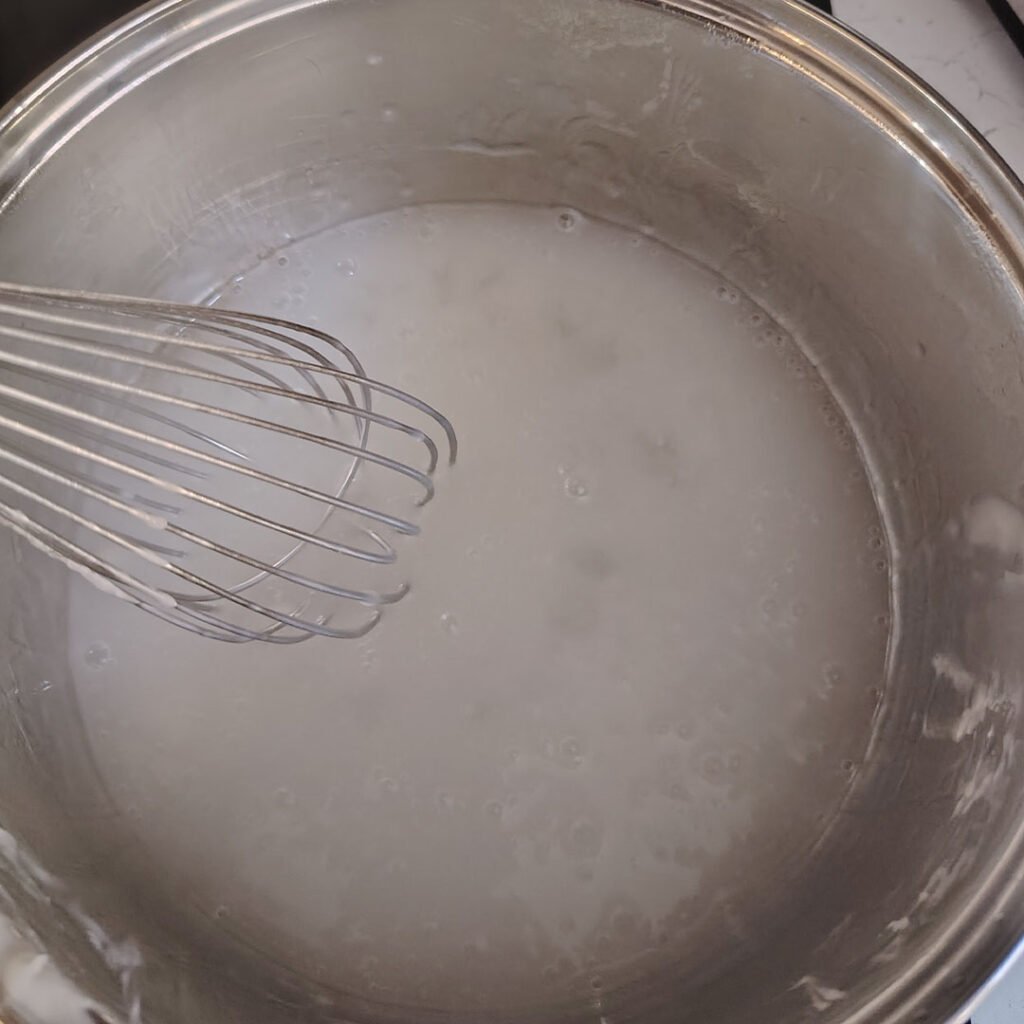
You want to begin by making your gel, which is very simple. Add some cornstarch (USA) or Cornflower (UK) to water and gently heat.
I used 2 cups of water to 4 tablespoons of cornstarch, this makes enough gel for one pack of seeds.
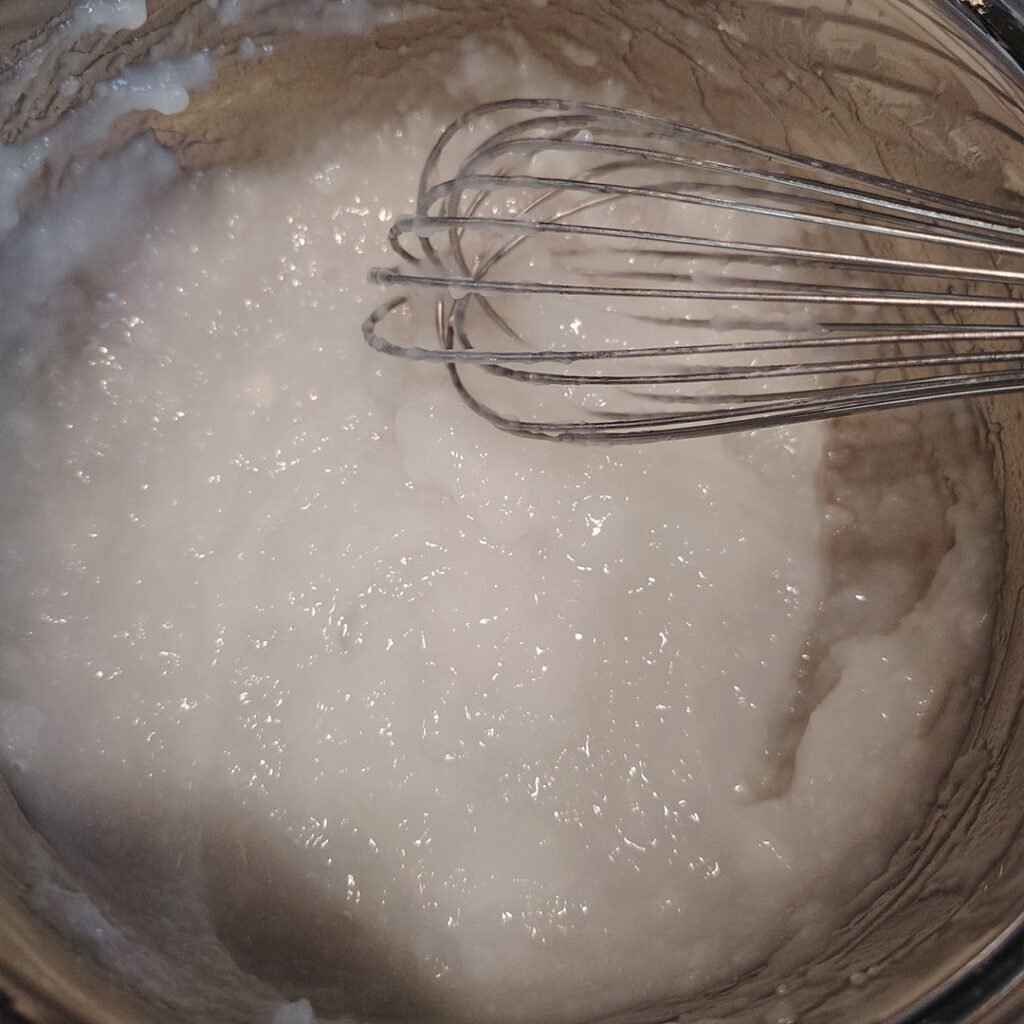
Heat this on a medium heat, but never let it boil, whisk as it heats. Once it starts to turn into a gel you can turn the heat off and let it cool. Ensure your gel is completely cool before adding any seeds or you will kill them.
My gel started to stick together after cooling, but no problem I just gave it another whisk and it was soon back to a gel.
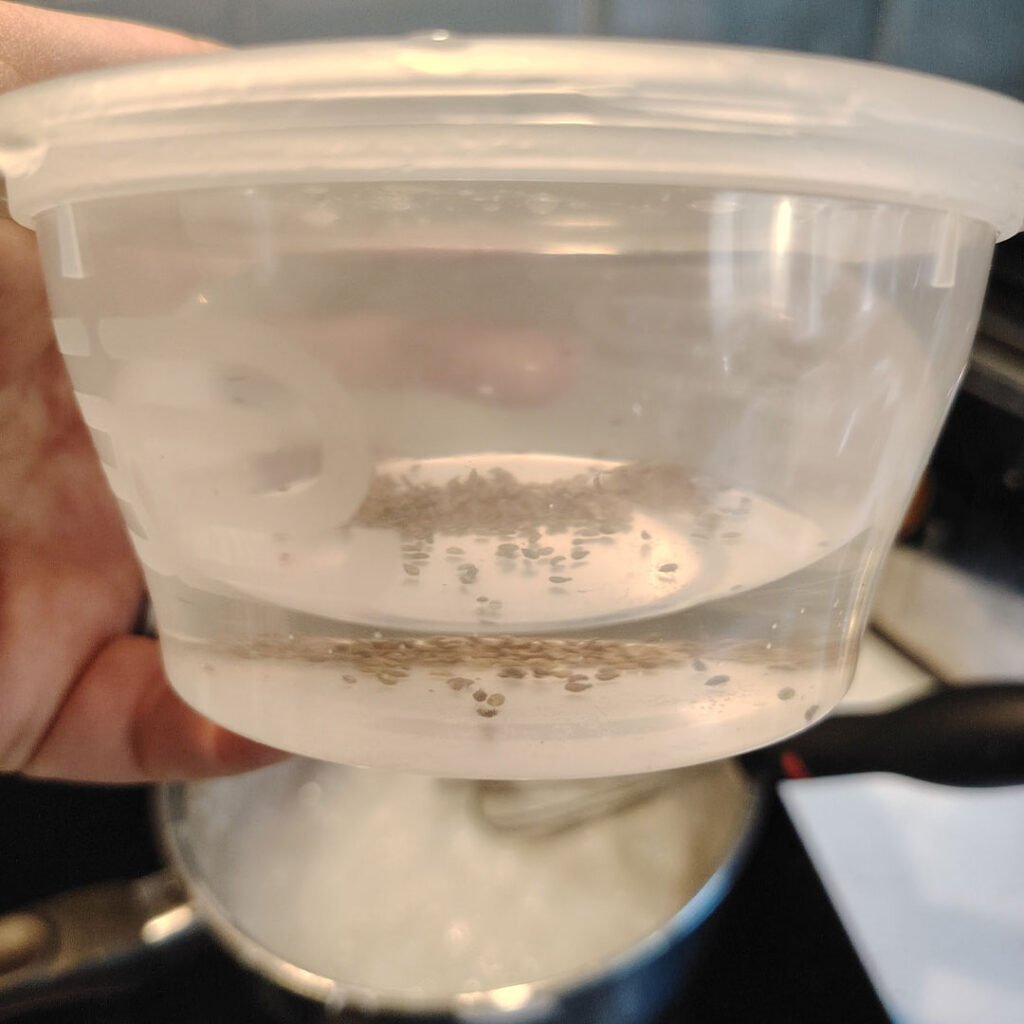
Now it is time to add our carrot seeds. I had mine pre soaking in some water for roughly 6 hours before.
This just gives them a better chance of germinating quickly. I didn't want to leave them in here too long as I didn't want the seeds sprouting. The reason I didn't want them to sprout is that is makes them delicate to handle.
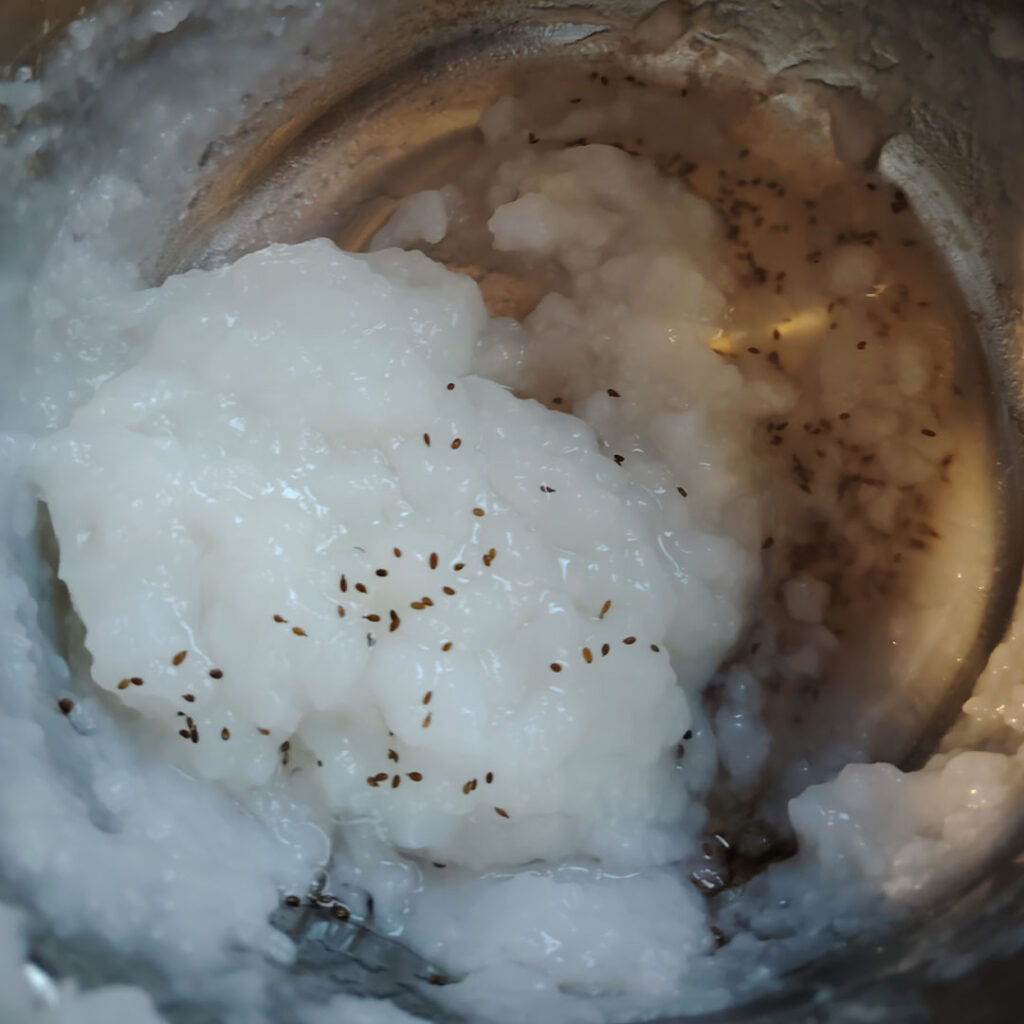
I mixed the seeds into my gel and gave it a gentle mix with the whisk.
Now I got a piping bag and folded the edges over this vase to make it easy to pour my mixture in. A little hack given to me by my wife who loves to bake.
You can use any sort of bag for this but we had piping bags so why not use the real deal!
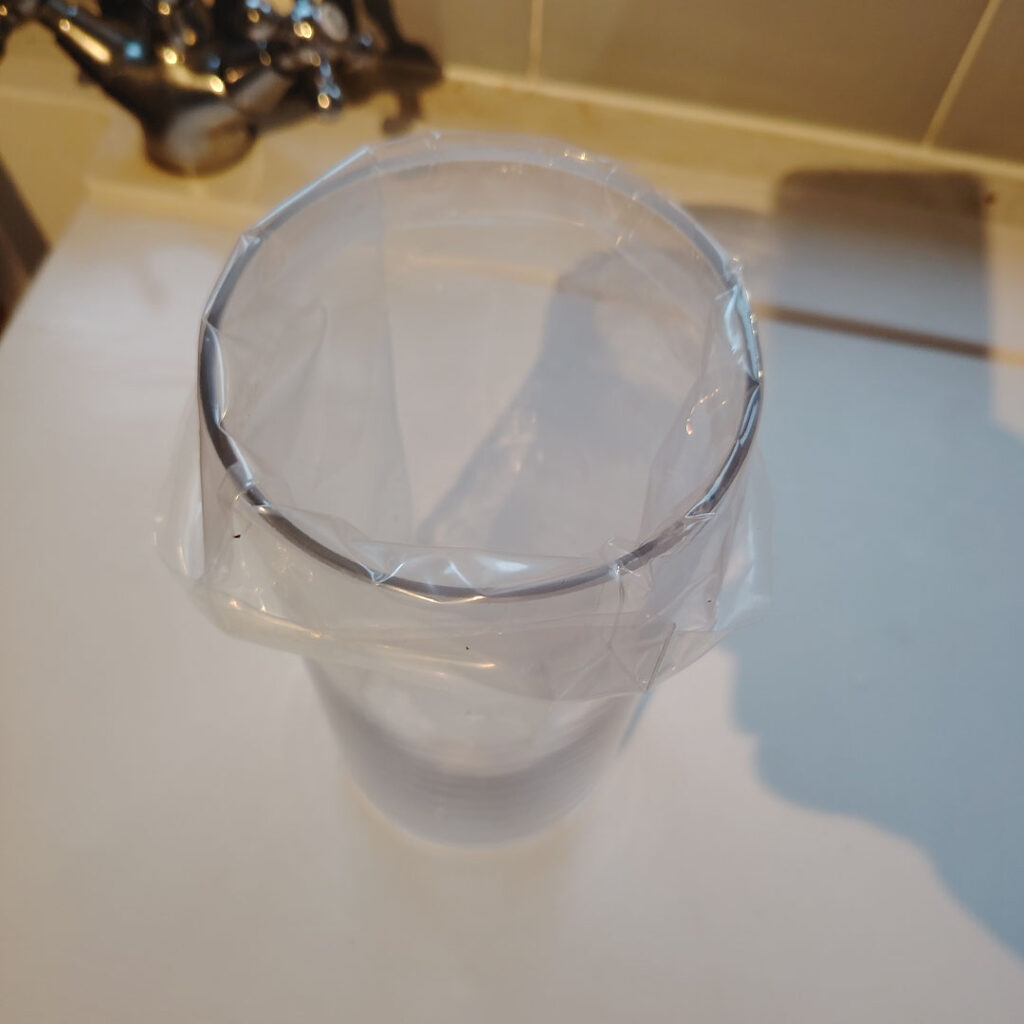
Just chuck the mix in and push it down to the bottom of the bag.
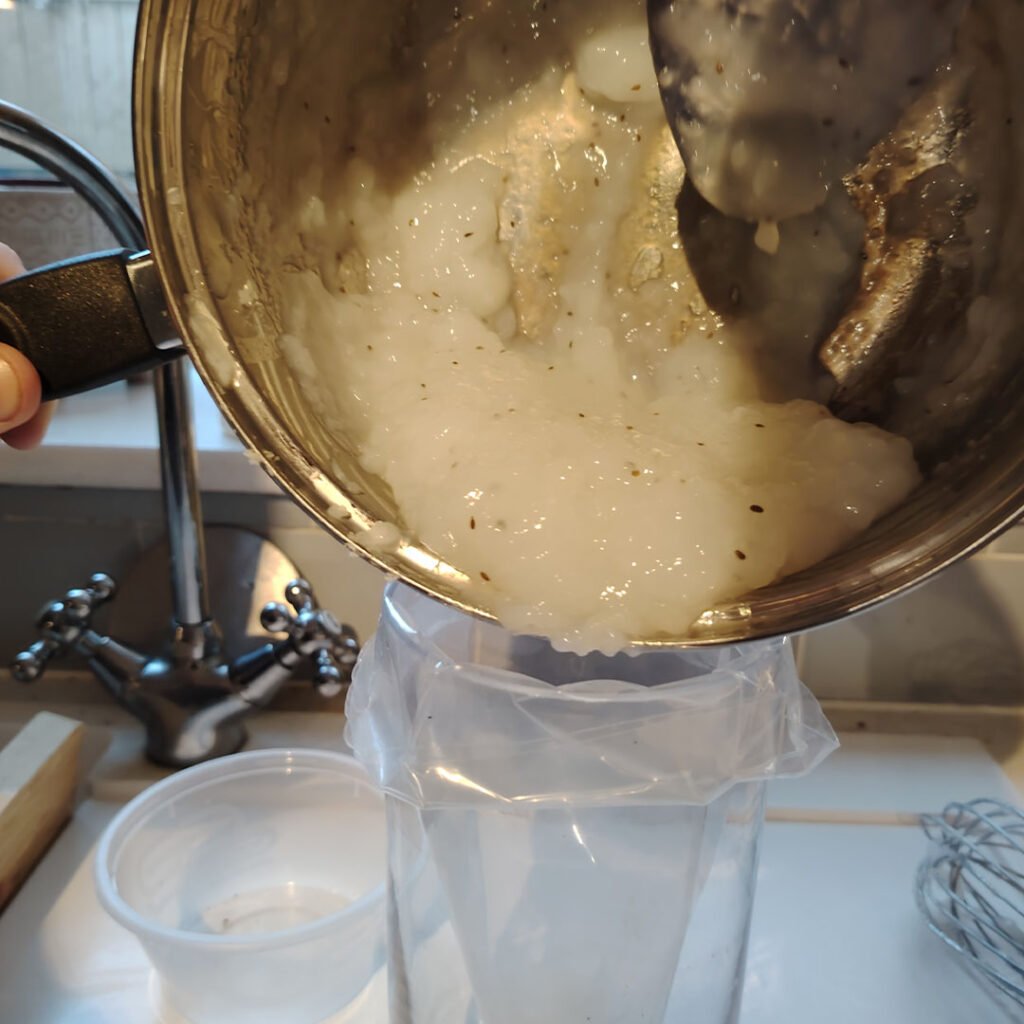
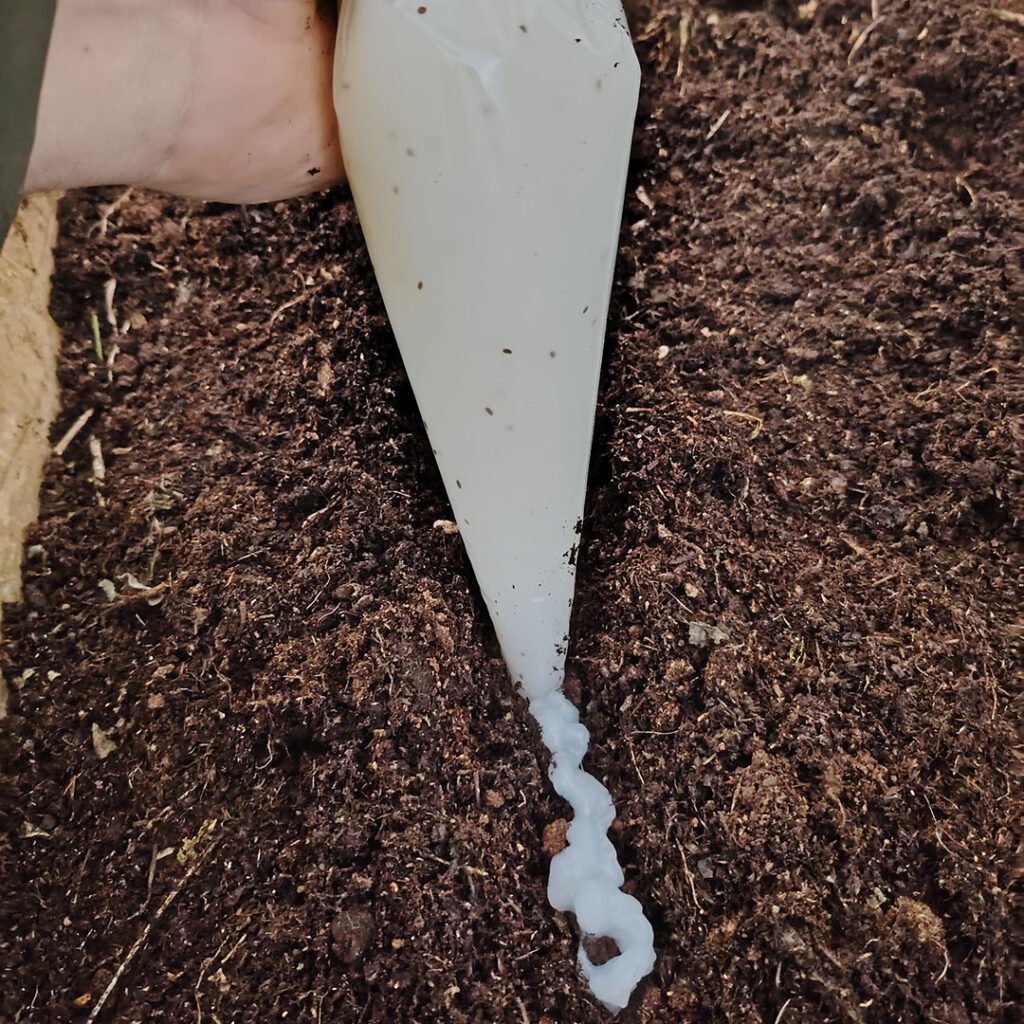
One questionable looking mixture - time to head to the garden.

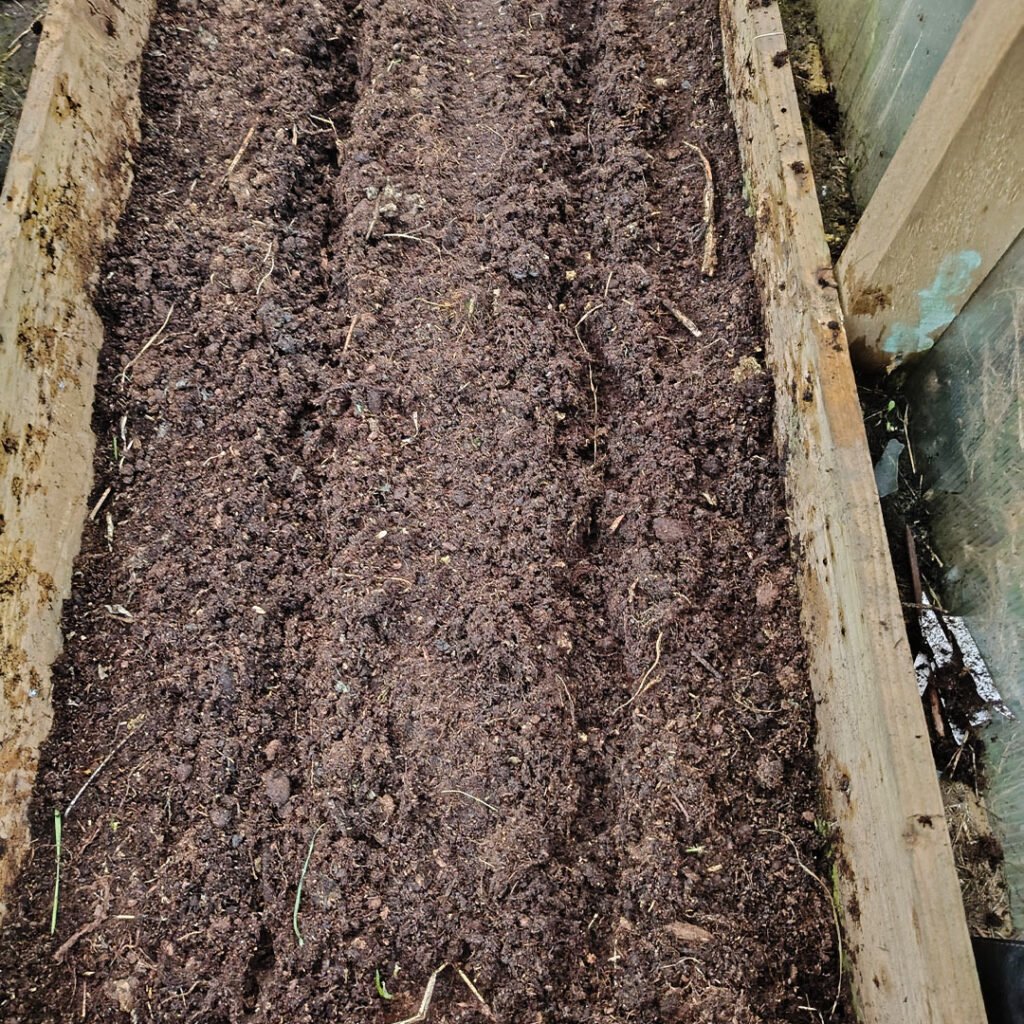
I made two shallow trenches in the bed I would be planting my carrots in.
Then I snipped the end of the piping bag with some scissors. The higher you cut the bigger the hole will be and the quicker your mixture will come out.
This will affect the spacing of your carrot seeds, so if you want them really spaced out then cut a smaller hole.
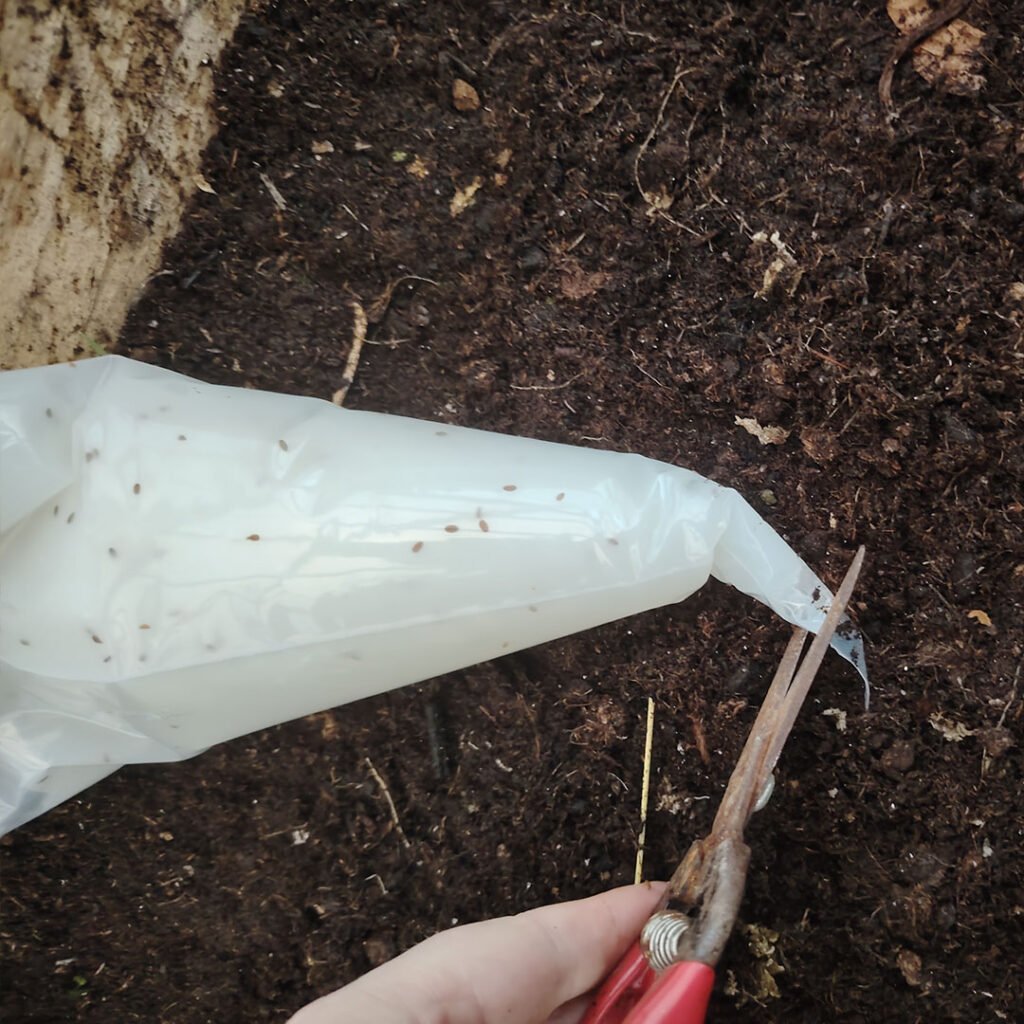
Then simply squirt your mixture into your trench, just like you were icing a cake.
The less said about this photo the better.

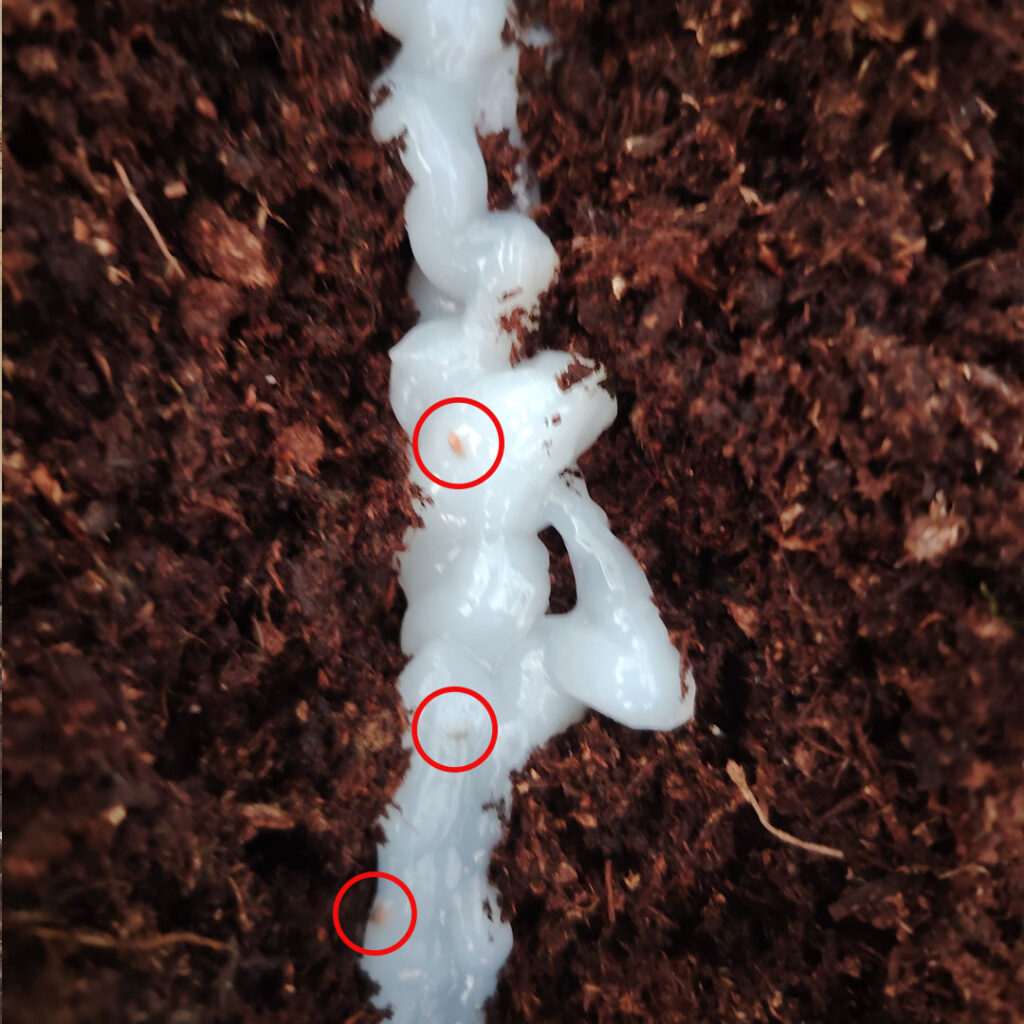
Here you can see the seeds being held in the gel, you can clearly see how it helps to space them out.
As the spacing is purely random you may have to do some thinning later but it will be a lot less than usual.
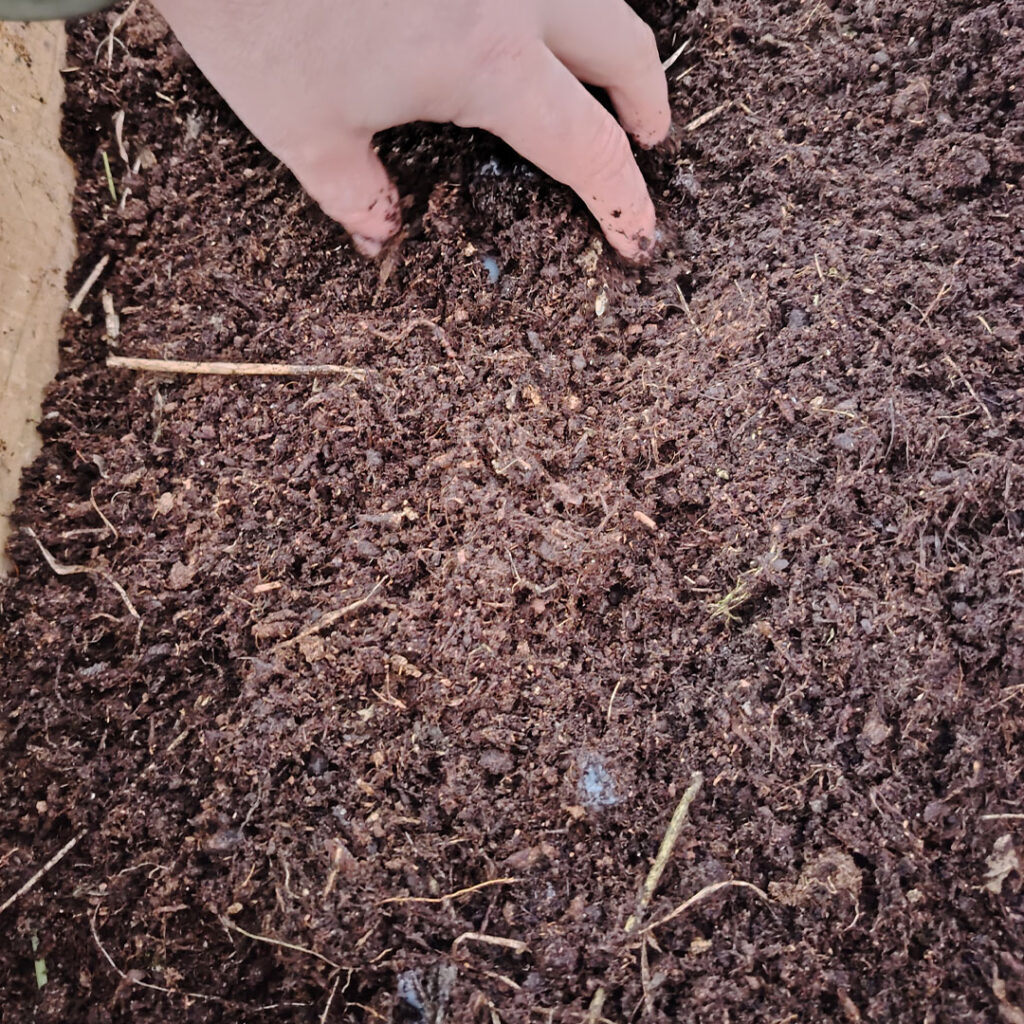
Now cover your rows over and you are done, carrots sown!
I will be sowing some other carrots normally next to these, so check back soon to see how they compare!


Leave a Reply