I have seen these washing baskets used as planters online for a while now, but people often use them for planting edibles, usually strawberries. I didn't want to grow anything I was going to eat in these, as I'm not sure how well the plastic will hold up and whether it will leech chemicals into my crops, so I had never pulled the trigger and made one. That is until I saw someone using them as a flower tower, what a great idea I thought. So here I am sharing that idea with you all.
The idea is very simple, get a washing or laundry basket (if your a bit posher than me!) with holes in it. You then use the holes to plant a tumbling flower which overtime takes over the entire basket leaving you with an impressive flower tower.
What Flowers to use?
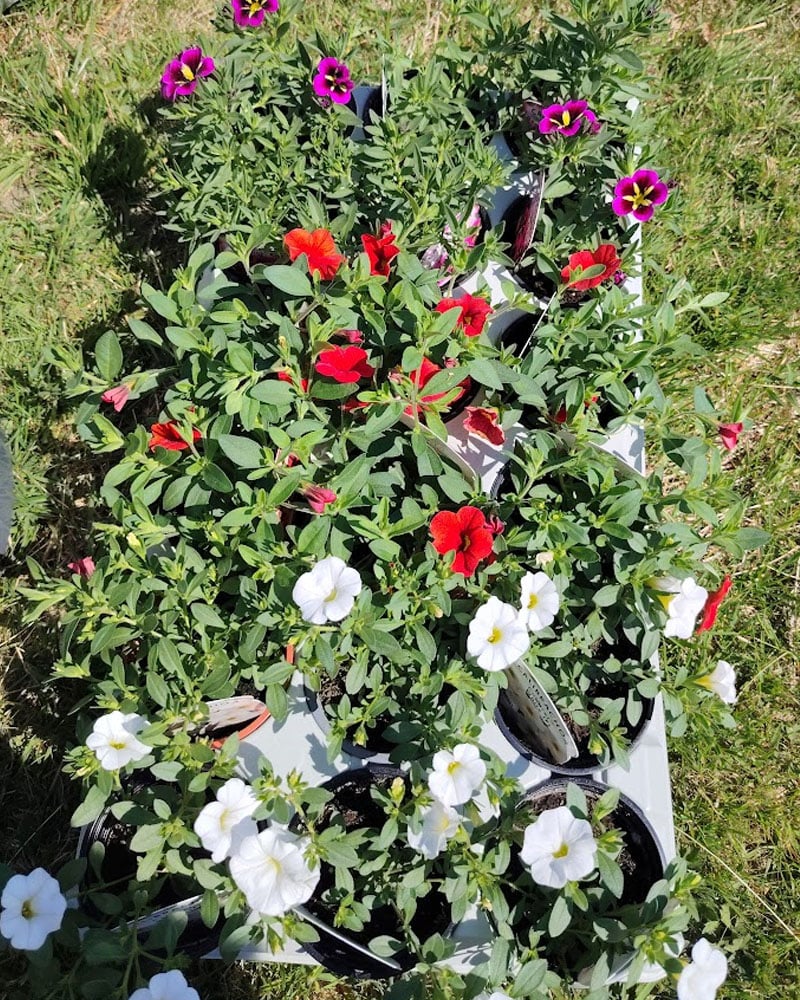
I am using Calibrachoa, or million bells, to give it its common name. This is essentially a miniature petunia, although I am unsure if they are officially related. It produces a mass of flowers, hence the million bells, and has a cascading nature, perfect for use in this flower tower.
There are loads of other good options, though. Essentially, anything that works well tumbling out of a hanging basket will work well here. These are the ideas I had when deciding what to plant in my tower.
- Bizzie Lizzies
- Petunias
- Trailing Begonias
- Lobelia
Picking A Basket
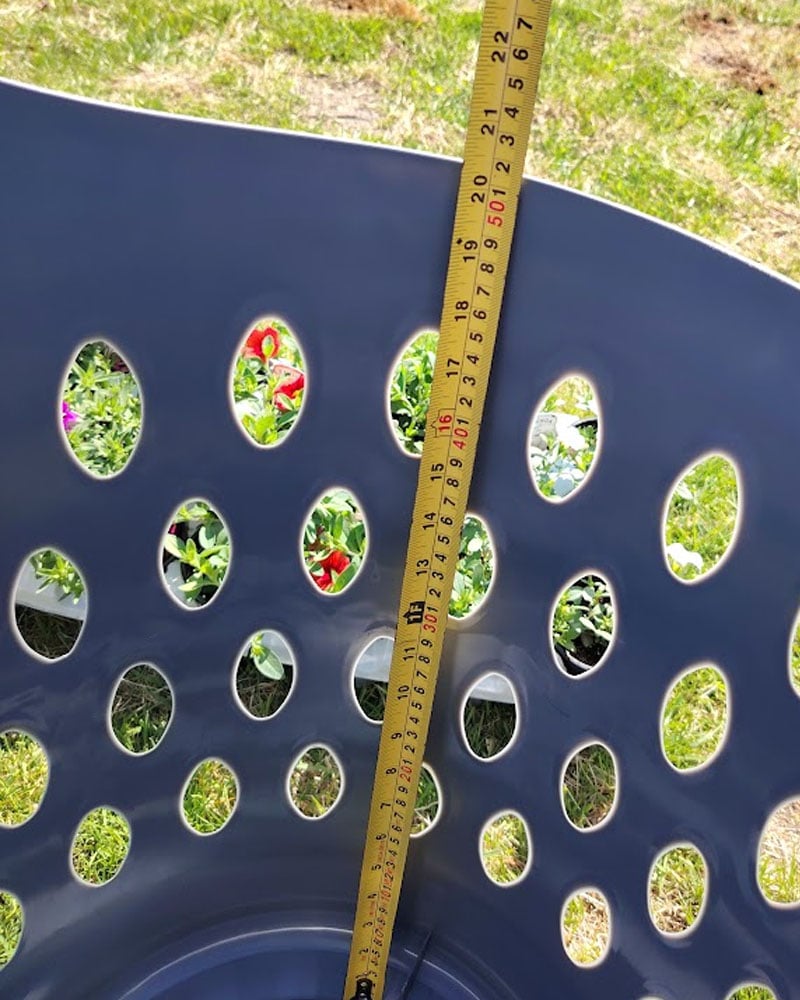
I hopped on Amazon and bought a basket from there. I'm sure you could probably find one cheaper locally if you look around, but I just went with the easy option. Choose one that has as wide holes as possible, as this will make planting much easier.
Also, you don't want to go too tall as these baskets get heavy when filled with compost. As you can see in the photo below mine is roughly 50cm tall.
Once you have your basket, you need to decide what to plant. As I mentioned before, I have gone with Calibrachoa.
The size of the plants you buy and the size of the holes in your basket will determine how easy it is to plant up. If you have smaller holes, then try to get plug plants if possible; these will be cheap and easy to plant. They will also catch up quickly, especially as most trailing plants are quick growers.
I bought some plants from the garden centre and they were a little large for the holes on my basket, meaning I had to remove a decent chunk of roots. The plants will recover from this without issue but it just means I wasted a bit of money!
Choosing Your Compost
Your next big decision is what compost to use, you want something that is packed with nutrition so you get the best flower display possible.
I wouldn't cheap out here, and I definitely think it's worth investing in a decent compost. I got the black gold from Growmoor. It's a very good compost but doesn't cost the earth, a good in-between option.

The next step is to line our basket with a bin bag. This will help keep the soil and, most importantly, moisture in. One big problem you will always have when packing a lot of plants into a container like this is keeping it well watered, the bin bag will help us out a lot.

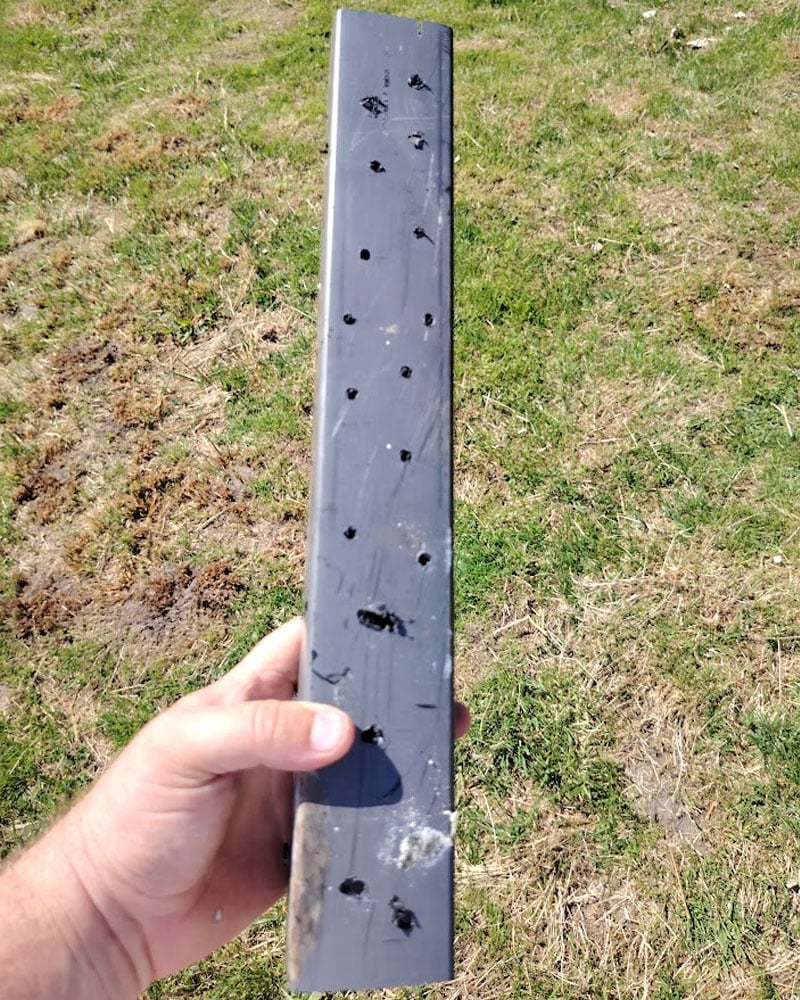
Next up, I am going to add some pipe to the centre of the basket, which serves a couple of purposes. It is mainly there to help distribute water to the bottom of the basket. Otherwise, it can be very tough to get the bottom watered.
As you can see below, I have drilled a load of holes in this bit of guttering downpipe so water comes out at all levels. This also fills some of the area in the centre of the basket it. Making the basket lighter and cheaper to fill as it doesn't need as much compost.
I added a little compost to the bottom of the basket and then added my pipe. I tried to line it up so that it would be just below the top of the basket.
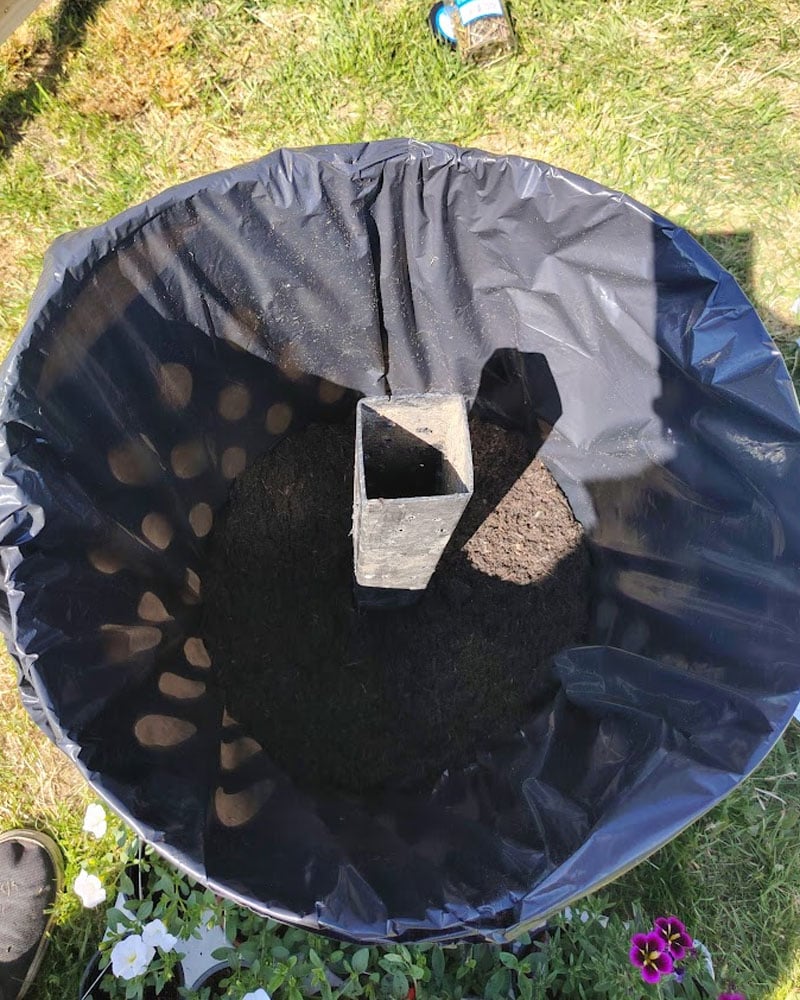
Once I had filled the basket up with compost, it took one 50L bag of compost to fill, it was time to start planting.
I cut a hole in the bin bag where I will plant and then popped the plants in. The pattern I am going for is diagonal stripes of different colours, which I think will look amazing once it has grown in.

As I mentioned before, the plants I chose were a little too big to easily squeeze into the holes. Because of this, I gently removed some compost, trying my best to keep the root structure as intact as possible, but some damage was inevitable.
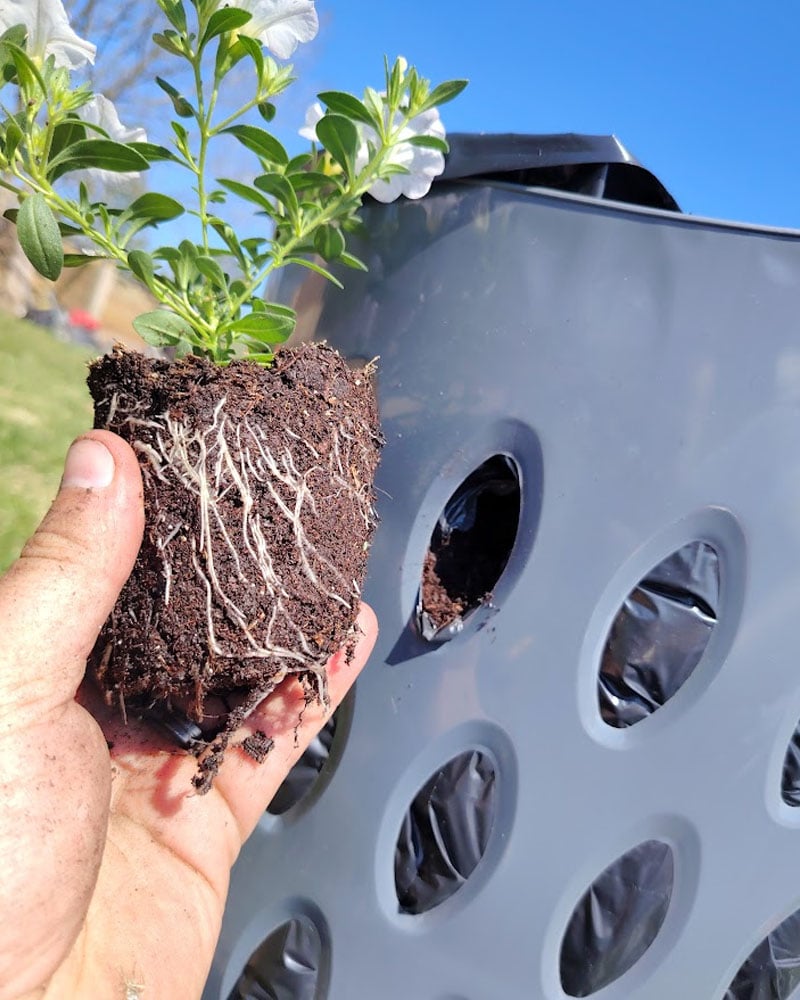

Above is what my plants looked like after I had tried to remove as much of the compost of possible.
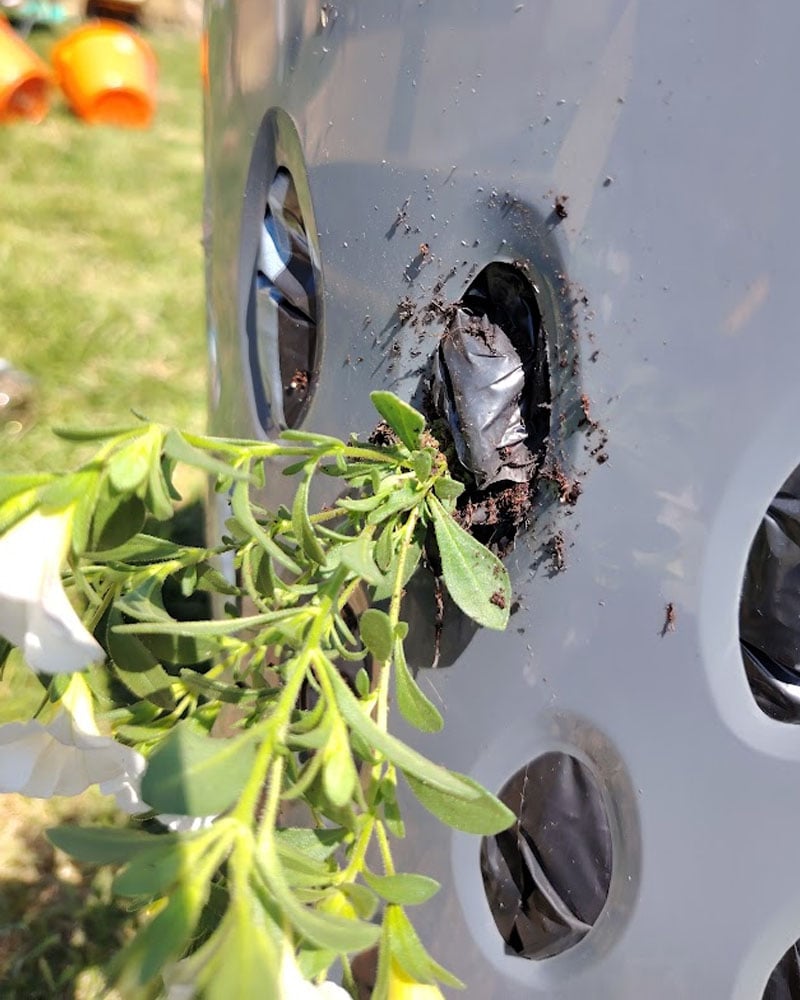
I then made a hole in the compost and squeezed the plants in.
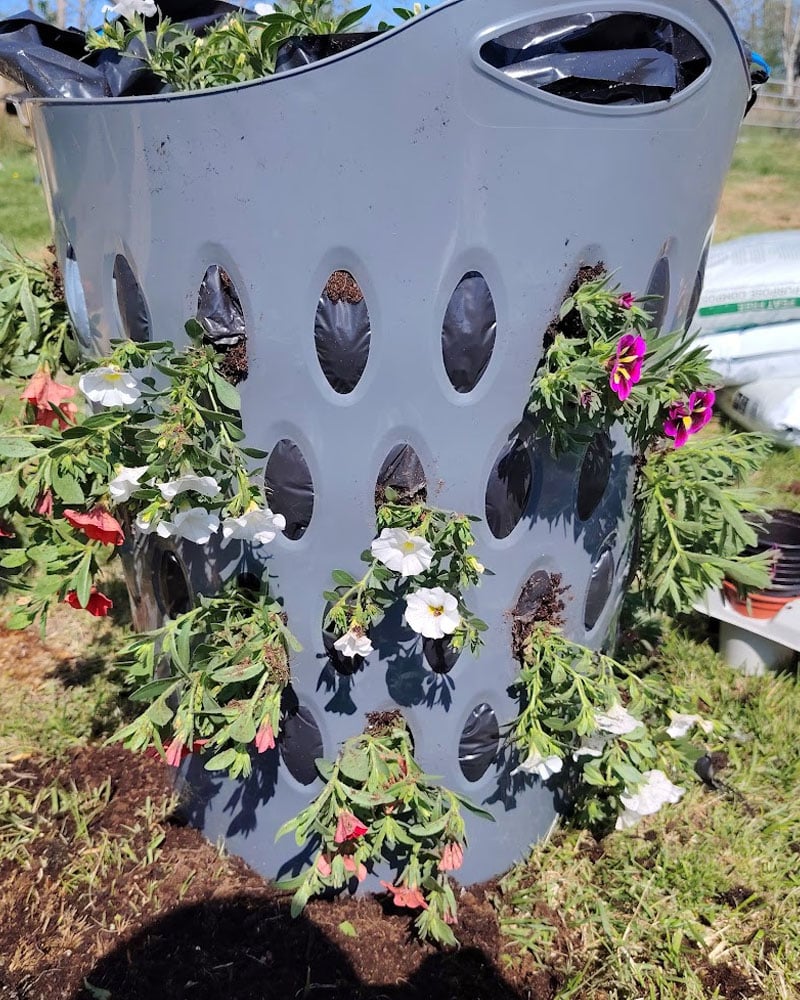
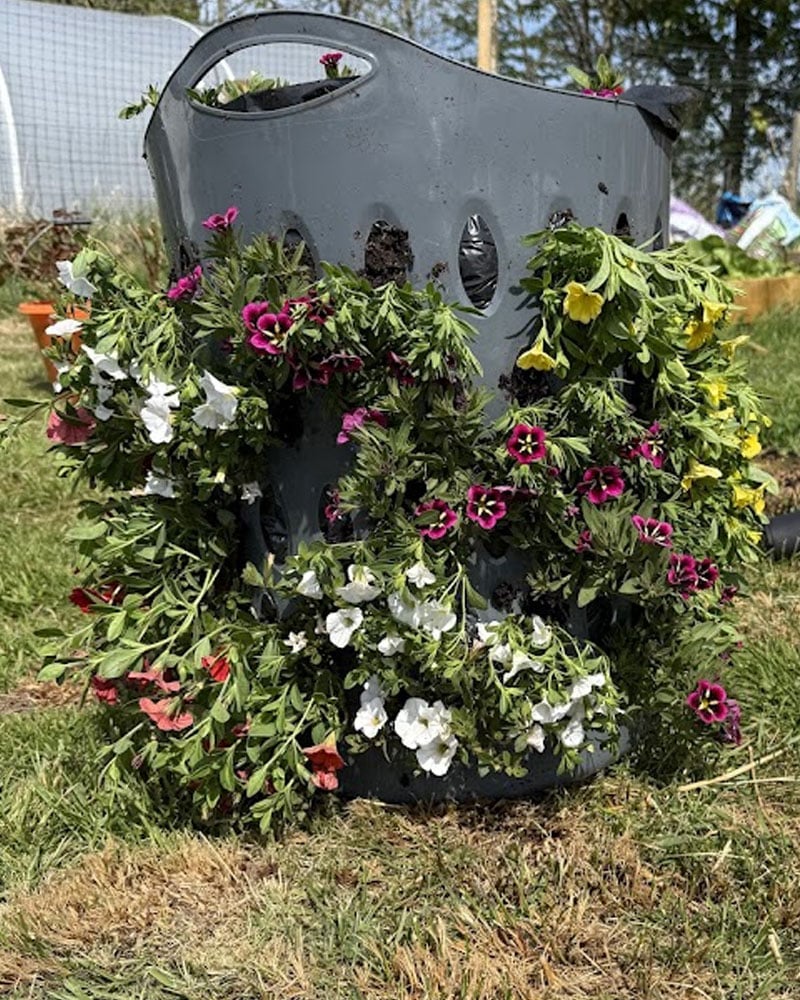
Here you can see the diagonal bands of colour that I am aiming for. I added two rows of each colour to help it fill out and cover the washing basket quicker.
I also added some plants to the top of the basket so these can grow up and over the sides, hopefully completely hiding the plastic.

Leave a Reply