We have answered this question once and for all, and to make it as thorough as possible we grabbed five different types of wood along with four different possible wood paints. We painted our wood samples with masonry paint, exterior gloss, fence paint and finally allcoat. Let's find out how the masonry paint got on in this mega test!
So below are all of the different squares of paints I will be testing. We will test each paint, both with a primed piece of wood, and an unprimed piece to see how much of a difference priming the wood first makes.
I applied two coats of paint to each sample, so the primed pieces ended up with three coats (1 coat of primer and two of the paint of choice).

Painting the wood
The masonry paint went onto the wood absolutely fine. It felt very similar to painting with the exterior gloss. The coverage was good but not excellent, without primer it would take three coats of the masonry paint to get really good coverage.
Dry time was relatively quick so if you are painting a large area like say a shed you wouldn't have to wait long between coats at all, the paint was dry enough to apply another coat within two hours.
Did it adhere?
Now all the pieces of wood had been left to dry overnight after their final coat it is time to test how well the paint has adhered to the surface.
I grabbed a rough piece of timber and scratched it across the surface of the painted pieces to see if any of the paint came away. Let's see how they all got on.
Masonry Paint on Plywood - Tested

Above we have the results for Masonry paint on Plywood. As you can see the paint has covered well, with the unprimed piece looking like it probably needs one more coat(which would be it's third) to finish it fully.
The paint has adhered to the Plywood excellently, nothing came away when I scrubbed it with the rough timber, this has definitely worked and the only thing left to test is how it performs outside in all elements.
Masonry Paint on Pine - Tested

Now for the same test but on a piece of pine. As you can see on the right-hand side of the image the unprimed piece of wood again looks like it could do with an additional coat of paint.
Masonry Paint on MDF - Tested

Now onto MDF, MDF can be a little tricky for some paints as it has a really absorbent surface that can suck up your paint so it will be interesting to see how the masonry paint got on, especially on the unprimed piece.
Again looking at the final result you will definitely need three coats if you don't plan on using a primer, you can still see a few marks in the sample on the right.
When it comes to surface adhesion though the masonry paint again excels, it has stuck brilliantly and even when attacked quite aggressively with a piece of rough saw wood there was no chipping or flaking.
Masonry Paint on Fencing Timber - Tested

So we move on to fencing timber. This rough sawn timber is commonly used in fencing and could be a great application for masonry paint. After all, we commonly paint fences not only for the nicer appearance but also to prolong the life of the wood, lets's see how the paint got on.
The masonry paint has actually covered really well here in just two coats, better than a lot of the other wood types.
Adhesion was once again excellent, with no problems here at all.
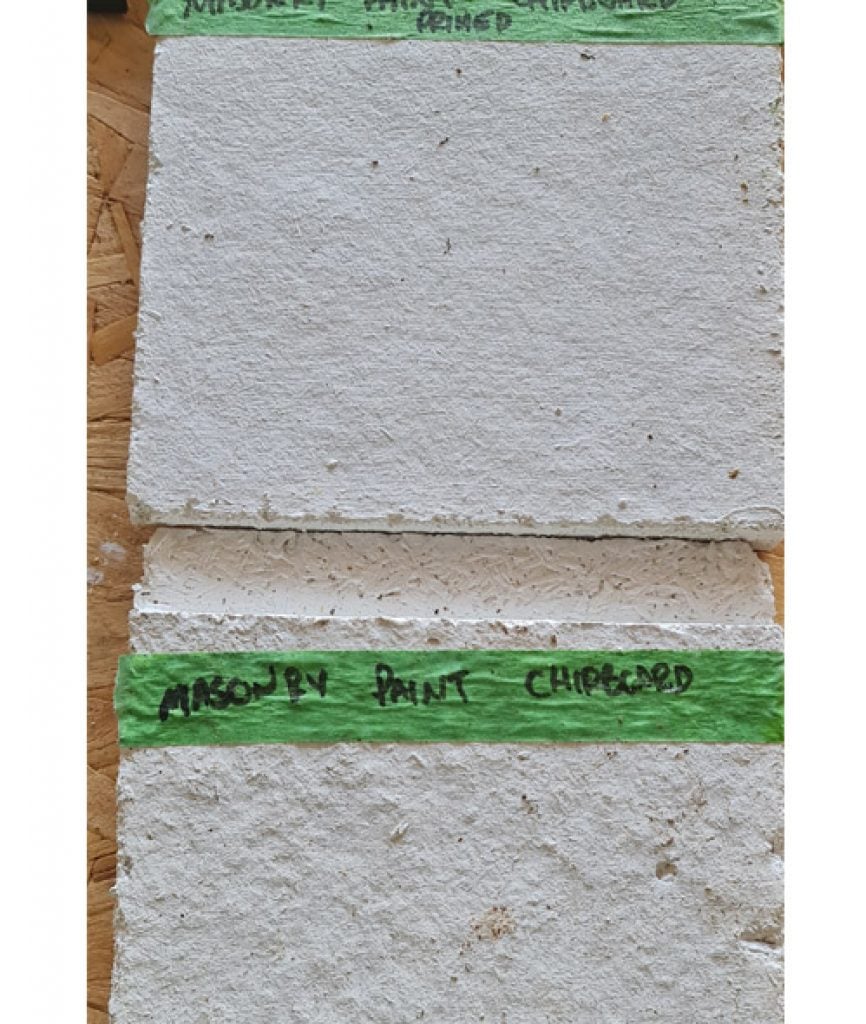
Masonry Paint on Chipboard - Tested

So we have reached the final wood type, chipboard. Chipboard is commonly used as flooring in newer houses and in lofts. But can you paint it with masonry paint?
The paint went on really well again and covered the wood well. The non-primed sample probably requires another coat to be perfect.
As far as adhesion goes both samples were great. You can see a chip on the right-hand sample bit this is where a piece of dirt which had been painted over was knocked off, so my fault rather than the paint
Outdoor Test!
So for the next section of our test, I will move all these samples outside into the elements. I will check on them periodically and update you on how they have survived, so keep checking back!
6 Months Outdoors
So the wood samples have been sitting outside now, fully exposed to the elements, for around six months. I think it's time to take a look at them all and give you guys an update.
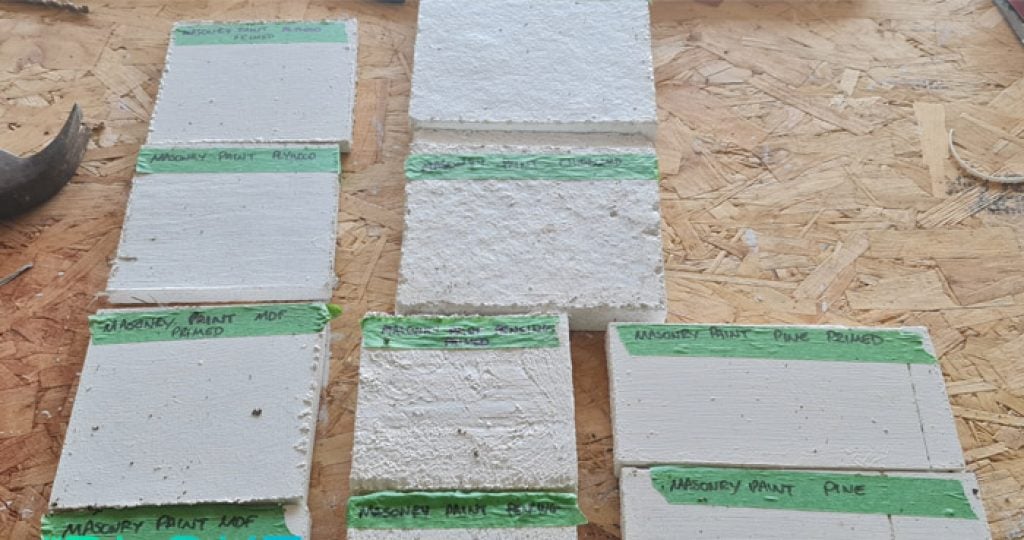
So here are all the samples, looking pretty good. But let's have a closer look at them all one by one as there are a few interesting things going on.
Pine

The pine has held up really well so far and there is no visible difference between the primed and unprimed pine.
So far so good, it looks like masonry paint will protect pine that is left outside.
MDF

Again, very much like before. The MDF has held up brilliantly, both the primed and un-primed still looking as good as new.
Plywood

Another one that is holding up perfectly and with no difference that I can see between the two samples.
Fencing Timber

Like all of the other woods so far the masonry paint has done a great job of protecting this fencing timber.
Chipboard
Now we finally have something to talk about. The chipboard has swelled quite a bit and gone lumpy. This obviously means water has been getting in somewhere.
You can also clearly see that the primed one has fared a lot better so far. So just adding that extra layer of paint has helped to seal it. Although it has still gone a little lump, but still nowhere near as bad as the sample without primer.
Can you use masonry paint on treated wood?
If you are building anything outdoors then you will probably be using treated wood. In the UK at least you commonly get either green treated or brown treated wood for outdoor use.
The treatment helps to stop the wood from rotting quickly but still needs to be painted ideally. And you have landed here because you are wondering if it is possible to use masonry paint on treated wood.
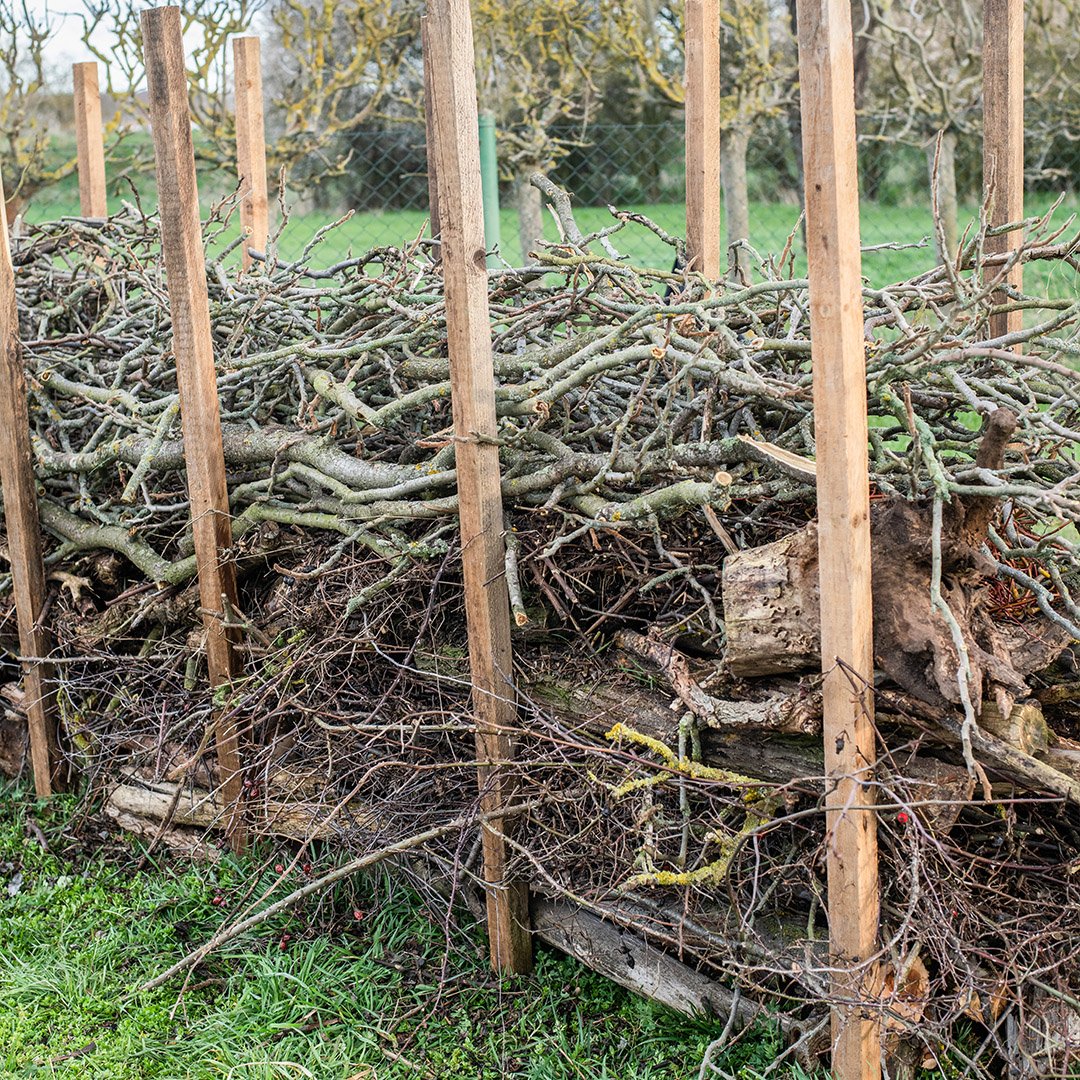
Well, I happen to have just constructed a brand new fence made from green-treated timber, and when it came time to paint this fence I decided to paint it with masonry paint. So I have done all the experimenting for you, read on to see how it worked out.

Here is the fence waiting to be painted. You can see the treatment in the featherboard, particularly the ones on the left-hand side. If I was to leave this treated timber it would slowly age to a silver/grey colour, like what you can see in the top right-hand corner of the background.
The problem with this is that it would look uneven for quite a while until it is fully aged. It would also be less protected than a fence painted with good protective paint, such as masonry paint.
So how well did the paint go on?
Really well actually. Painting the treated wood with masonry paint was a breeze. The paint went on nice and easy, just like painting any wall with emulsion, to be honest.
The coverage was really good, in fact, I only needed one coat to fully cover all of the treatment in the wood. This is because masonry paint is quite thick, due to it needing to cover brick and stone usually.

The only thing you need to think about is getting the paint into all of the knots and uneven surfaces of the wood. This is a little more difficult than painting a smooth surface but to be honest it is not that difficult. Just put some paint on the end of your brush and push it into all the little cracks and gaps.
The final result

So here you can see the painted fence. I will remind you that this is just a single coat of masonry paint, look how well it has covered! This was a miss-match of all different colours of timber that now looks nice and uniform. The paint was touch dry within an hour so overall the process was really easy.
One great advantage of painting with masonry paint is that it is waterproof within one hour, obviously a key feature when painting outdoors in the UK! Because of this, you don't need to worry too much about the weather as long as it is not actively raining as you are painting.
What paint did I use?
The paint I went with was SandTex ultra-smooth. This is crucial, you don't want textured paint on wood unless you are really after the textured look. The smooth is just like an emulsion really so nothing to worry too much about.
SandTex is probably the most popular masonry paint in the UK, you can find it everywhere. Any of the big DIY stores will probably have it in stock, or you can even buy it online from Amazon.
The colour used here is mid stone, I really like this colour for wood. It still looks quite natural while being a nice bright colour.
6 Month Fence Update!
For those of you keeping track, it's now been six months since the fence was painted with masonry paint (give or take a few weeks). So it's time to check back in with an update and let you all know how the paint is getting on, I know you can't wait!

As you can see the fence still looks just as good as the day it was painted. So that's the summer over with, now time for the real test, a Northern English winter. Check back next year for another instalment in this thrilling saga!
What is treated wood?
Normally treated timber, at least in the UK, comes in two forms. There is green-treated timber and brown-treated timber. Green-treated timber can often look quite natural but with a green tint. Brown treated timber however is commonly a very dark brown.
Green treated wood
This wood has been pressure treated to help it last longer in exterior use. The chemicals used in green-treated wood have copper in them. It is then this copper which reacts with the sap in the timber and also the oxygen in the air, this then creates the green colour you see on the treated wood.
The colour often varies between batches. This is illustrated perfectly on my new fence up at the top of this post. Some of the timber is really green whereas other parts look quite natural.
This wood has all had the same level of treatment, just different batches turn out different colours. This is why treated timber is nearly always painted or stained to make it more uniform.
Brown treated wood
Brown-treated wood goes through the same process as green-treated wood. The only difference is that a brown dye is added to the mix. That is the only difference between the two. The brown dye makes the wood darker and in theory more uniform, it doesn't add any extra protection.
I saw it makes it more uniform in theory as I have often found brown treated wood to be just as much of a miss-match of colours as green treated wood.
Because of the extra step involved with creating brown-treated wood, it is usually a little more expensive than green-treated wood. it can often be really dark, so if you are planning of painting it a light colour this could be a disadvantage, on the flip side of this, however, if you are planning on painting it dark this could be an advantage.


Leave a Reply