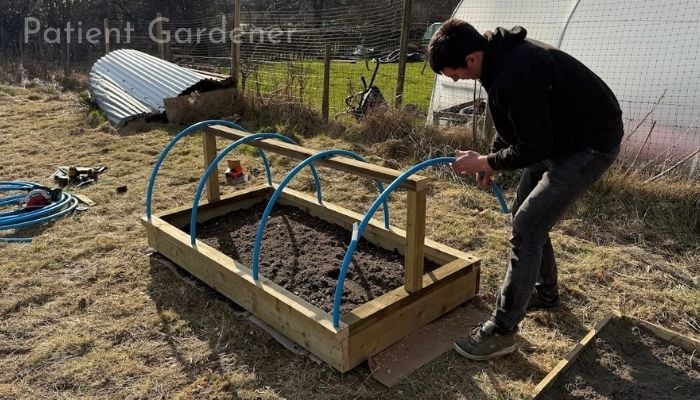
If you’re looking for an easy and effective way to extend your growing season, protect your plants, and simplify garden maintenance, a hinged hoop house might be just what you need. Unlike traditional row covers or fixed greenhouses, hinged hoop houses offer the flexibility of easy access while still providing the protection your plants need to thrive.
Whether you're shielding delicate seedlings from frost, keeping pests at bay, or creating the perfect microclimate for year-round growing, this simple structure can make a huge difference in your garden. In this article, I will show you exactly how you can make your own hinged hoop house.
Free PDF plans at the bottom of the article
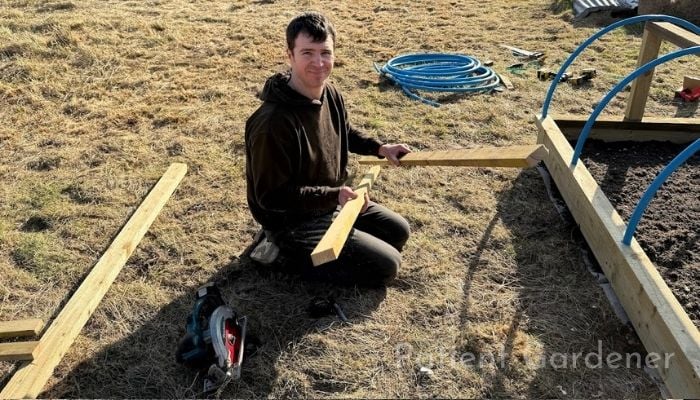
1. Making The Frame

Sam installed this bed on top of an existing raised bed (build guide for that coming soon). If you are putting yours on an existing bed, then make sure the wood is thick enough to support the hinges and weight of this hoop house.
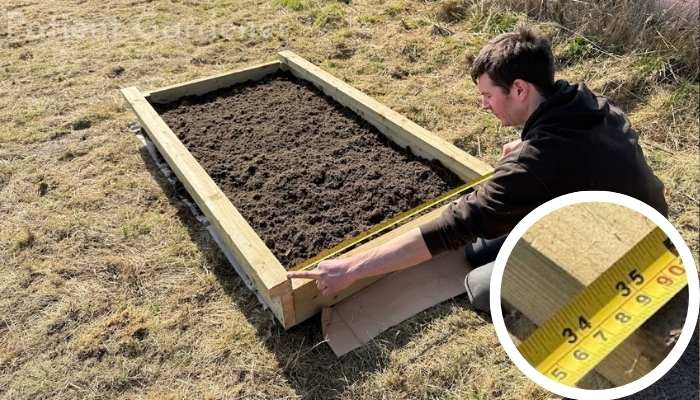
Measure the length of your raised bed and cut two pieces of timber to the same length.
We used 3" x 2" Rough Sawn Treated Timber
Our raised beds were 6ft (1800mm)
2. Cut The Ends
Make the ends slightly longer than necessary so the frame sticks over 1" along the front edge.
This will give a nice overhang that you can use as a handle to lift the hoop house.
We cut our ends at 34.5" (875mm) for our raised beds
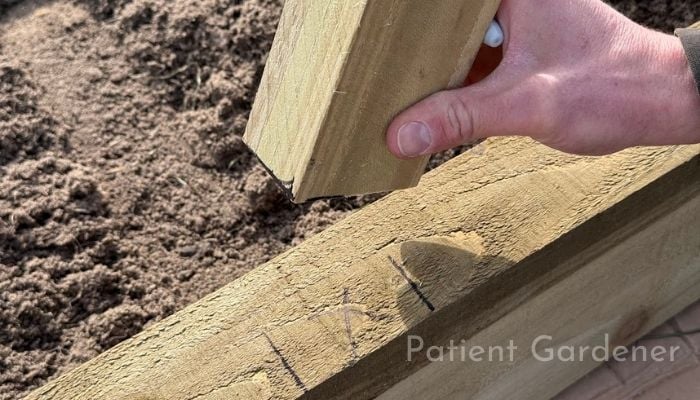
3. Pilot The Corners
Use a small pilot bit, I used a 3/16" (5mm) pilot bit and drill through the first timber only.
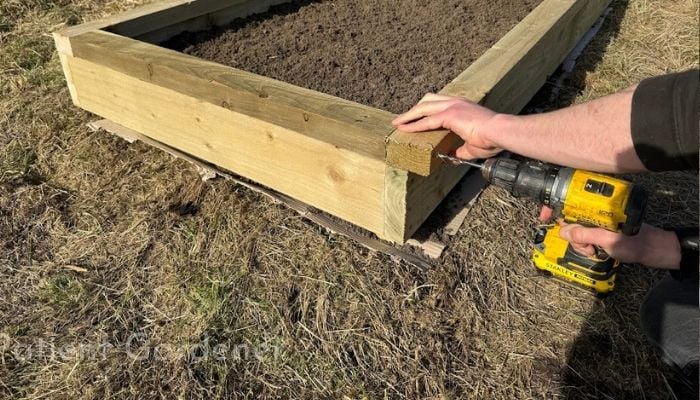
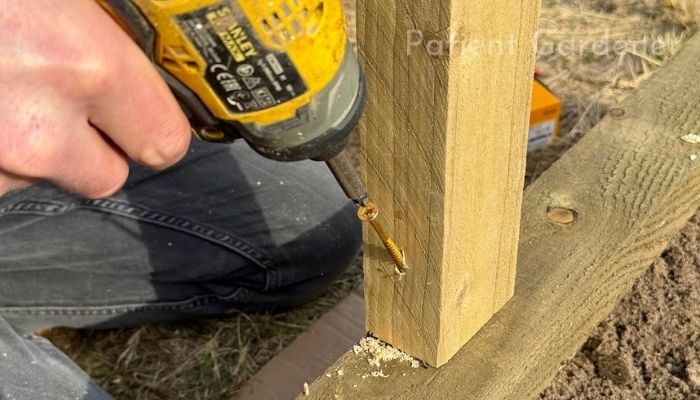
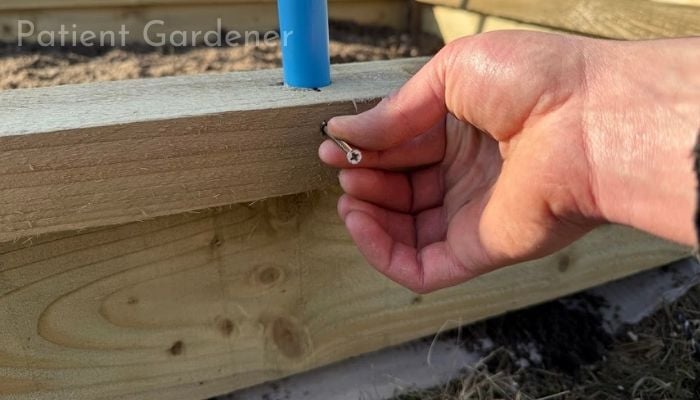
4. Screw The Corners
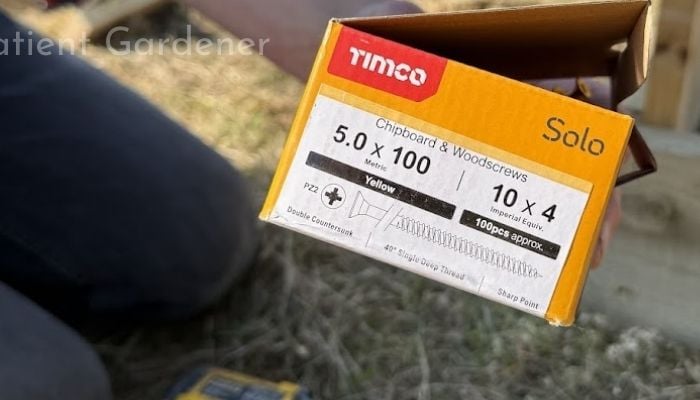
Use 4" (100mm) wood screws to fix the 3"x2" sides to the 3"x2" ends.
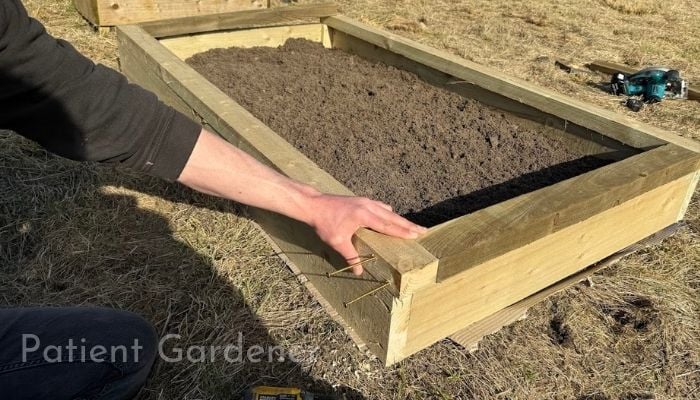
Put two screws in each corner. This rectangular frame will form the base of your hoop house.
6. Cut The Uprights

Cut two upright timbers to half the width of the planter, not the hoop house frame!
We cut our uprights to 18" (450mm)
7. Center the uprights
Fix your uprights to the centre of the hoop house frame, flush with the outer edge. You are in the centre if the distance to the frame edge is the same on both sides of the post.
8. Screw The Uprights
Pocket screw the uprights into position using the same 4" (100mm) wood screws.
9. Fit The Cross-Bar

Cut the cross-bar to the same length as the frame. Fix the cross-bar with two 4" (100mm) screws. Don’t forget to drill your pilot holes!
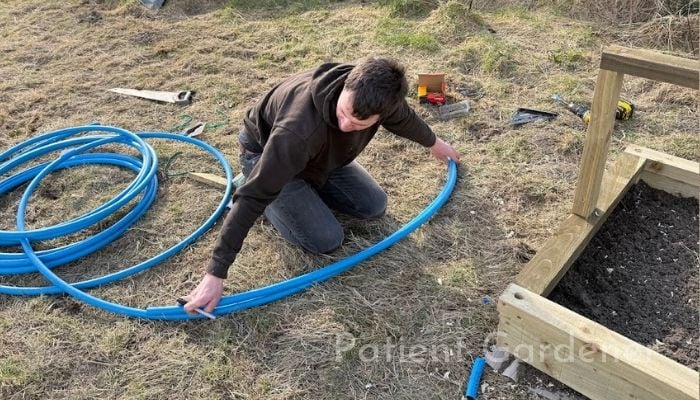
10. Mark the alkathine pipe
Hold the alkathine pipe at one end of the hoop house and bend it roughly into the correct position. Mark the pipe 1" longer with a marker pen as you can always trim this down later!
11. Cut the pipe
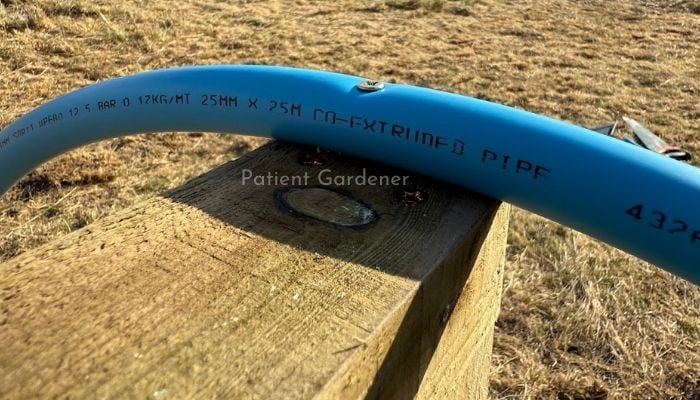
You can cut the pipe using a handsaw, angle grinder, hacksaw, garden shears, or circular saw. We used 25mm alkathine pipe.
12. Drill the corner holes
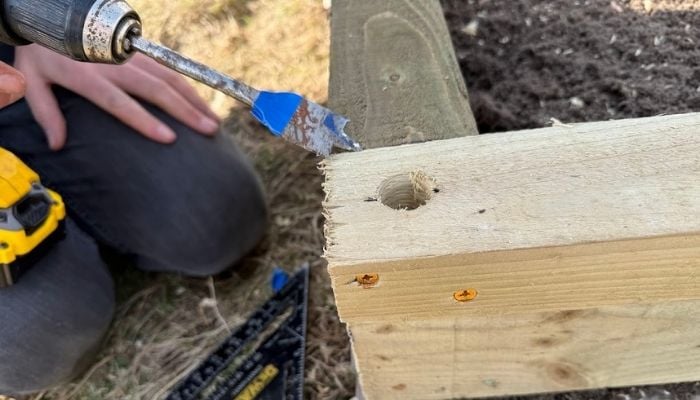
Mark the centre of the 4 corners
We measured 1.5" (37mm) in from both edges to give us our centre point.
We used a 25mm spade bit to drill our holes.
13. Mark the drill depth
Only drill half way through your 3x2 frame with your spade bit. Use some tape to mark half the depth of the 3"x2" on the drill bit. You can see Sams blue tape in the photo above.
14. check the pipe length
Check that the pipe fits all the way into the 25mm holes and touches the cross-bar at the top.
Keep cutting off any excess pipe, this is now your template rib!
15. Mark The Ribs
Use the template pipe to mark and cut the rest of the ribs to the correct length, to from the spine.
We used 4 lengths of pipe for our 6ft (1800mm) hoop house.
16. Cut the ribs to length
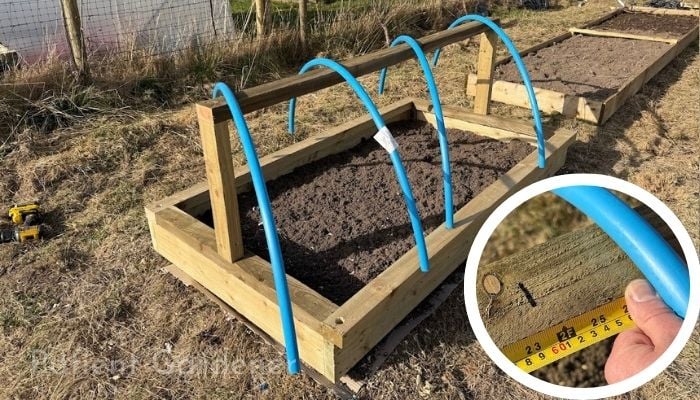
Once the ribs are cut to length space them out equally.
We spaced our 4 ribs every 2ft (600mm) for our 6ft long hoop house.
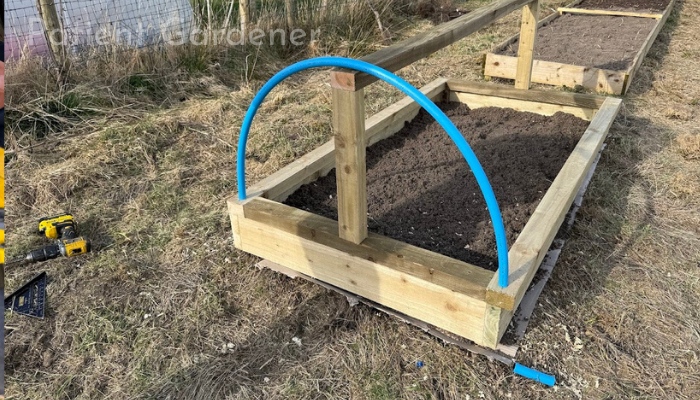
17. Form the spine
Push all the ribs into the 25mm holes and ensure they all touch the cross-bar.
18. Fix the hoop ends

Pilot the alkathine pipe with a 3/16" (4mm) drill bit. Use 2" (50mm) wood screws to fix the pipe to the cross-bar.
19. Fix the hoop ends

Make sure the pipe slightly over-hangs the sharp end of the 3"x2" cross-bar.
20. Screw in the hoop ends
Make sure that the screws sit slightly bellow flush with the top of the pipe. This will ensure they do not tear the polythene sheet.
21. Fix ribs to cross-bar
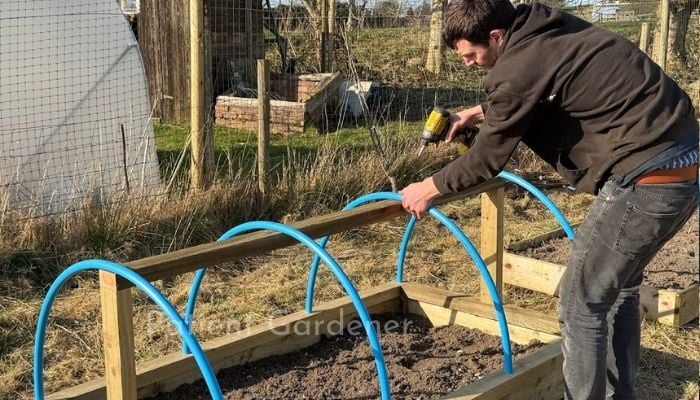
Work your way along fixing all the pipe ribs into position every 2ft (600mm) with a single screw through the top of the pipe.
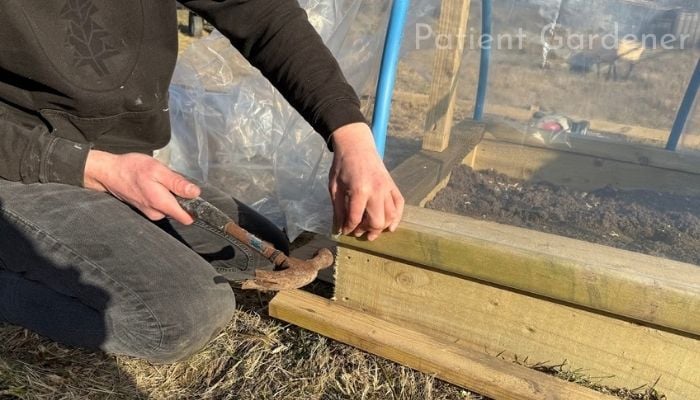
22. Fit the locking screw
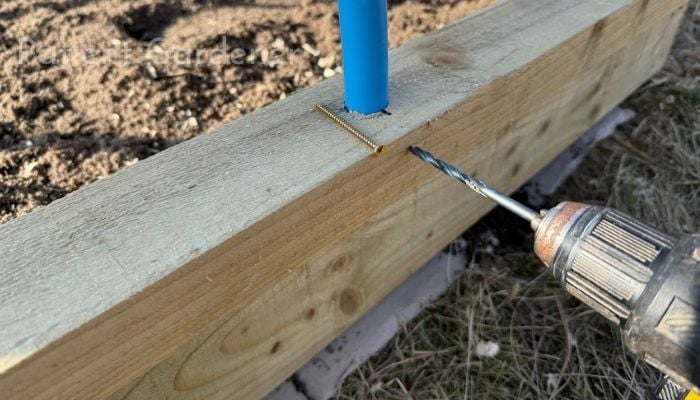
Drill a 3/16" (4mm) pilot hole through the side of the hoop house frame ½" (12mm) down from the top edge. Only pilot drill through the timber, and not into the plastic pipe!
Use a 2" (50mm) wood screw to attach the pipe to the frame. This will act as locking screw stoping the pipe from slipping out, when you open and close the hoop house.
23. Fix all ribs to the frame

Work your way around the hoop house attaching a locking screw to the pipe ends, to ensure they stay in position.
24. Offer the sheet over

Throw the sheet over the hoop house and cut it 1ft (300mm) over-size all the way around. The excess will be trimmed off later.
25. Cut timber battens
Cut two timber battens to the length of the hoop house, to help you attach the polythene sheet.
We used rough sawn 2"x1" slate batten cut to 6ft (1800mm)
26. Fix the 1st batten
Wrap the polythene sheet around the first batten and nail it to one of the long sides of the frame.
Wrapping the batten prevents it from rotting and it looks neater!
27. Fix the 2nd batten

Pull the polythene sheet over the hoop house, then wrap it around the second batten.
You can keep adjusting the wrap around the second batten in order to get the sheet taught.
28. Pleat the ends

Start in the middle by forming a “V-shape” then work out to the edges.
Pinch the polythene sheet at the top and keep folding over 2" (50mm) at the bottom and keep stapling the pleats into position
29. Fit the last 2 battens
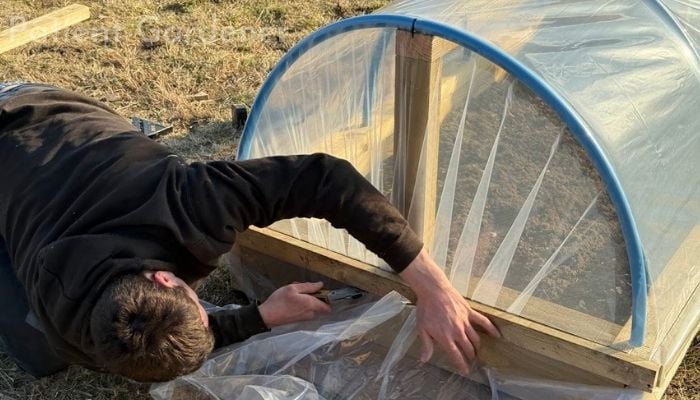
Cut the battens to the length of the ends and nail them into position using 50mm glavanised round wire nails. Cut off the remaining polythene sheet with a stanley knife
30. Fit the hinges

Position your hinges 6" (150mm) in from either end. Make sure that the knuckle of the hinge is in the centre where the hoop house frame meets the raised bed. We used two 4" (100mm) stainless steel ball-bearing hinges, so they are less likely to rust!

Now your hinges are in place, you can lift up your hoop house from the lip at the front edge.
Now you can get sowing and growing!


Leave a Reply