I wanted to put a new fence on my new allotment plot to separate the front and the back. It's a very long plot, and I wanted a bit more privacy and a garden feel to the back half of the plot. So I needed a fence, and I decided to go for a modern horizontal slat design—here's how I built it.
Part 1 - Putting the posts in
The first step to this fence build is getting the posts in. I decided to use postcrete instead of concrete for this. The reasons are pretty simple: I wasn't putting many in, so the cost difference wasn't too much, and I love how quick postcrete sets, meaning I can do everything in a day.
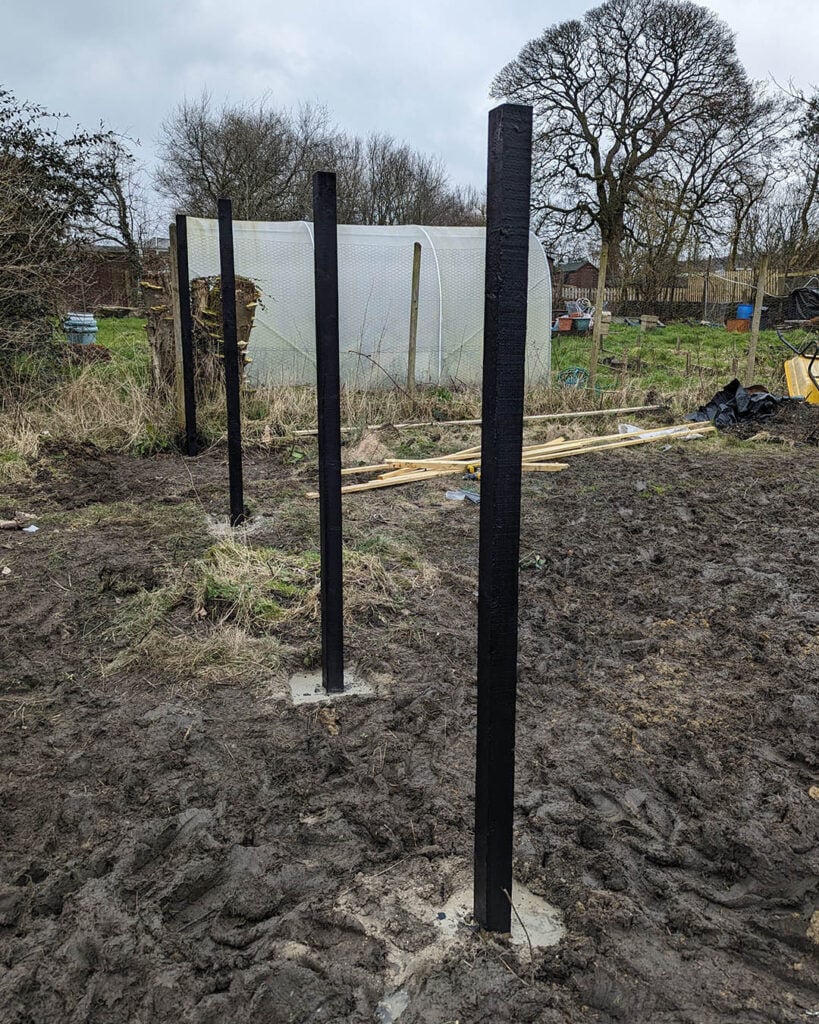
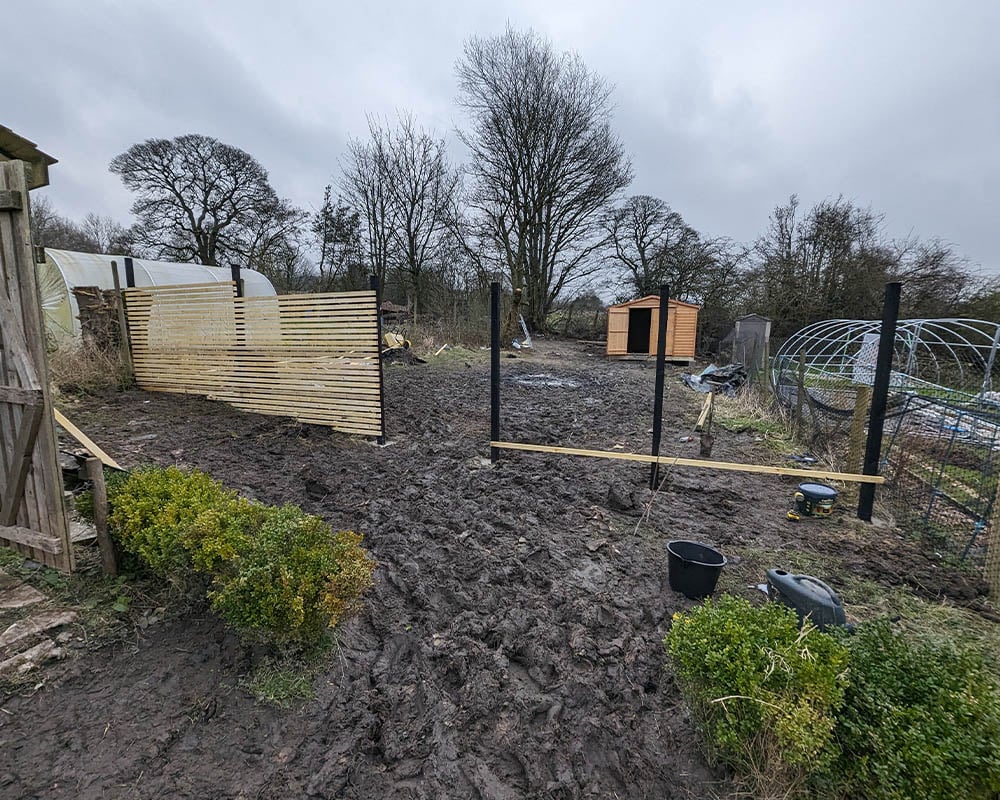
So, to begin, I decided on the position of my first post and dug a big hole. I used 8ft posts, so I tried to dig roughly 2ft deep so I would have a final height of 6ft. The actual fence height will be shorter than this but i plan on sawing the posts down a little once everything is completed.
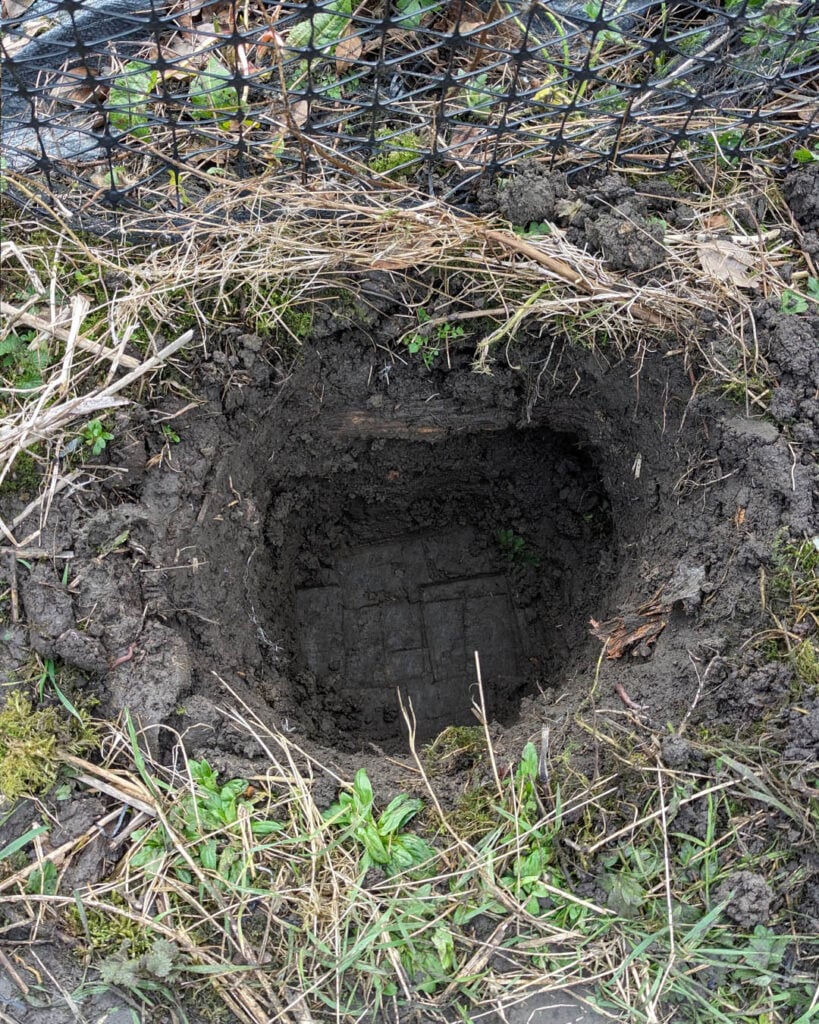
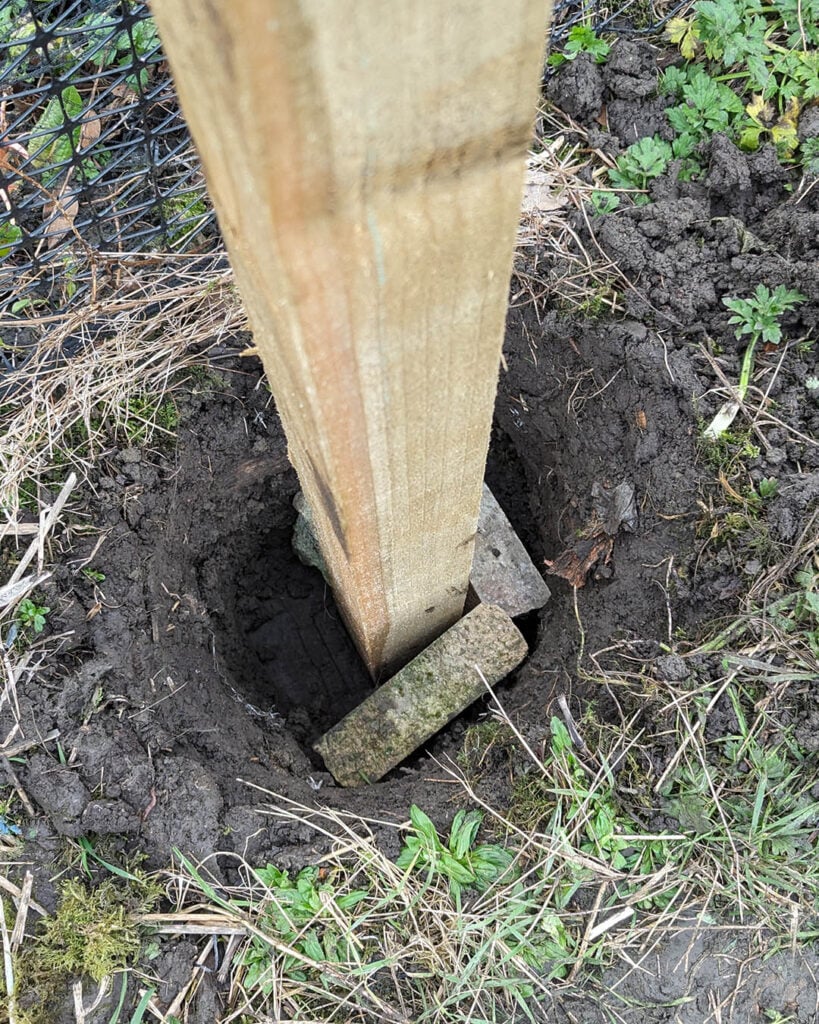
I placed some large stones around the base of the post to help wedge it in place and hold the post in place a bit while it sets. Then you want to add some water to the hole, I made it a quarter full although half full is what it will usually say on the bag, and then throw your back of postmix in there. (get your spirit levels to hand before adding the postmix, as you won't have long to adjust the position of the post before it sets!)
I added less water to the hole as the ground is soaked at the moment and we had intermittent showers as we were building.
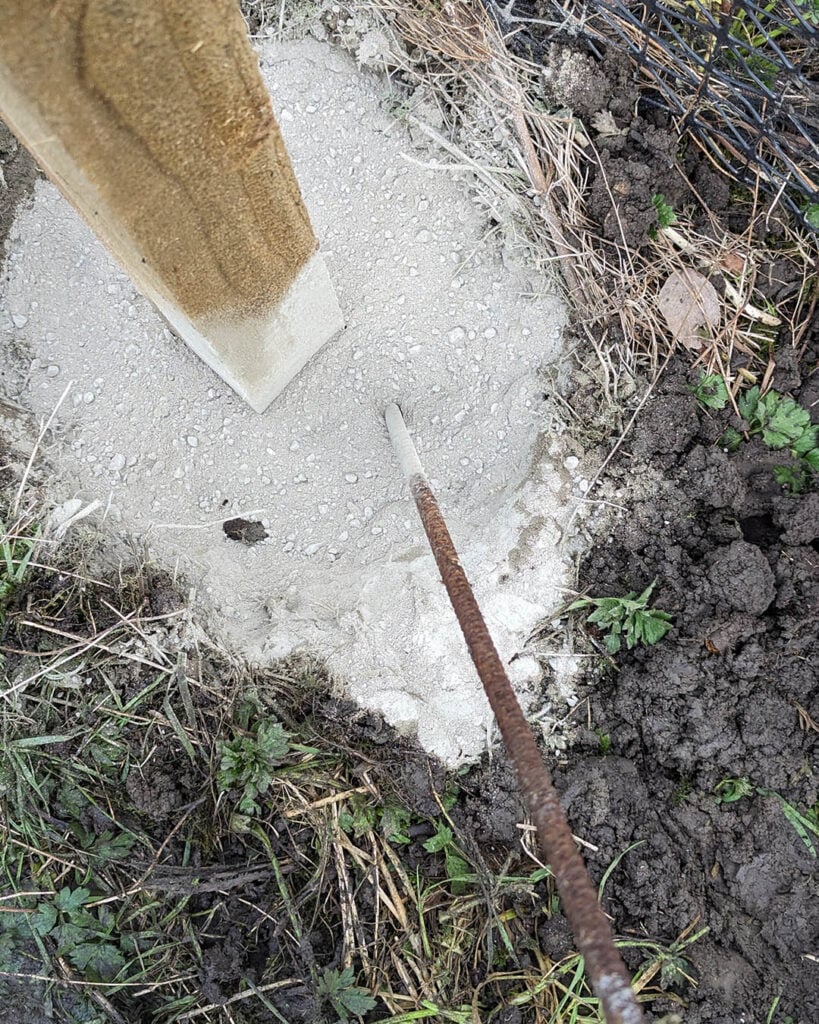
I used a metal rod to help aerate the mix and ensure the water was getting everywhere. (I also used 2 bags of postcrete per hole) Then, add more water to the top of the hole. You then have roughly 5-10 minutes until the postmix sets.

Two spirit levels clamped to both sides of the post help you quickly see whether your post is straight in both directions.
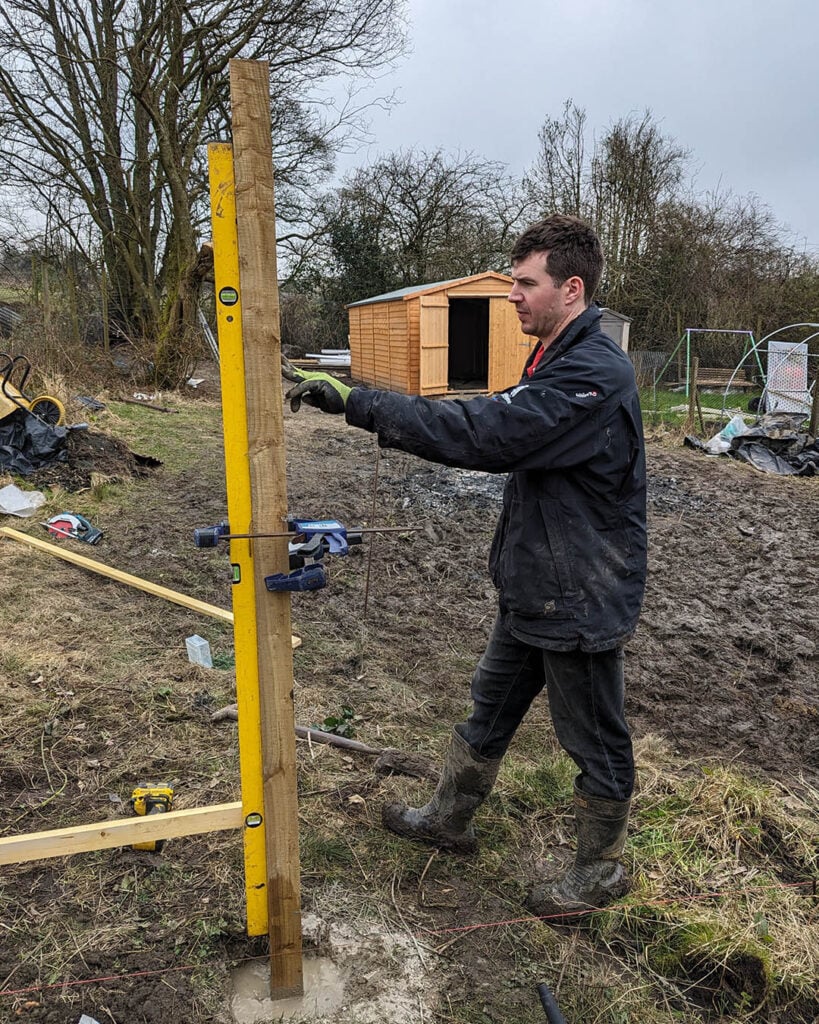
Then hold the post in place for roughly 5-10 minutes while ensuring it is straight. After that it will have set enough to be left alone. I don't recommend doing any work on the post, such as screwing into it for a few hours as the postcrete will still be properly setting and hardening.
Using a string line to align the posts
After that, we ran a string line from the first post to determine the position of the last post. Nothing is straight on this allotment, so there wasn't anything to reference, so we just went with whatever looked best to the eye.

Once we were happy with the position of the opposite end post we dug a whole and set it in the exact same ways as the first post. Once we had each end up we could run a string line between the two and use this to line up all the other posts.

After a lot of repetitive work all of the posts were in.

We also fixed some batons between the posts as we were working to support them and ensure everything was straight and properly aligned.
Once all the posts were set I went round and painted them all black. Its a lot easier to do this now rather than after the horizontal batons have been attached!
Part 2 - Attaching the horizontal batons
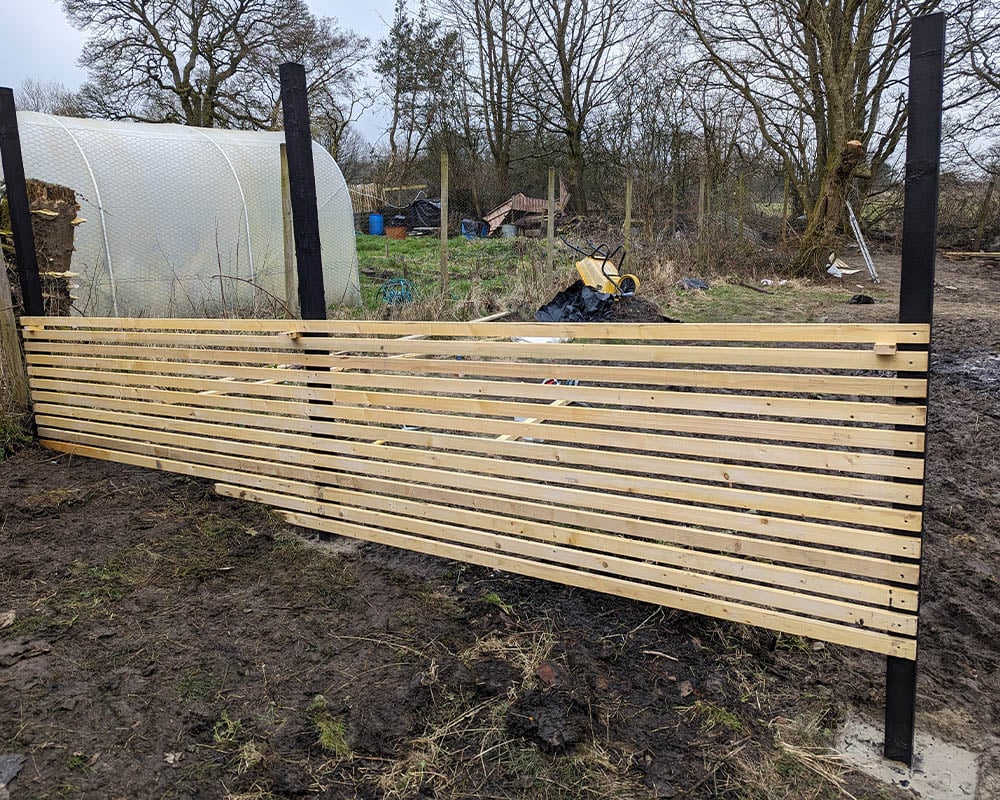
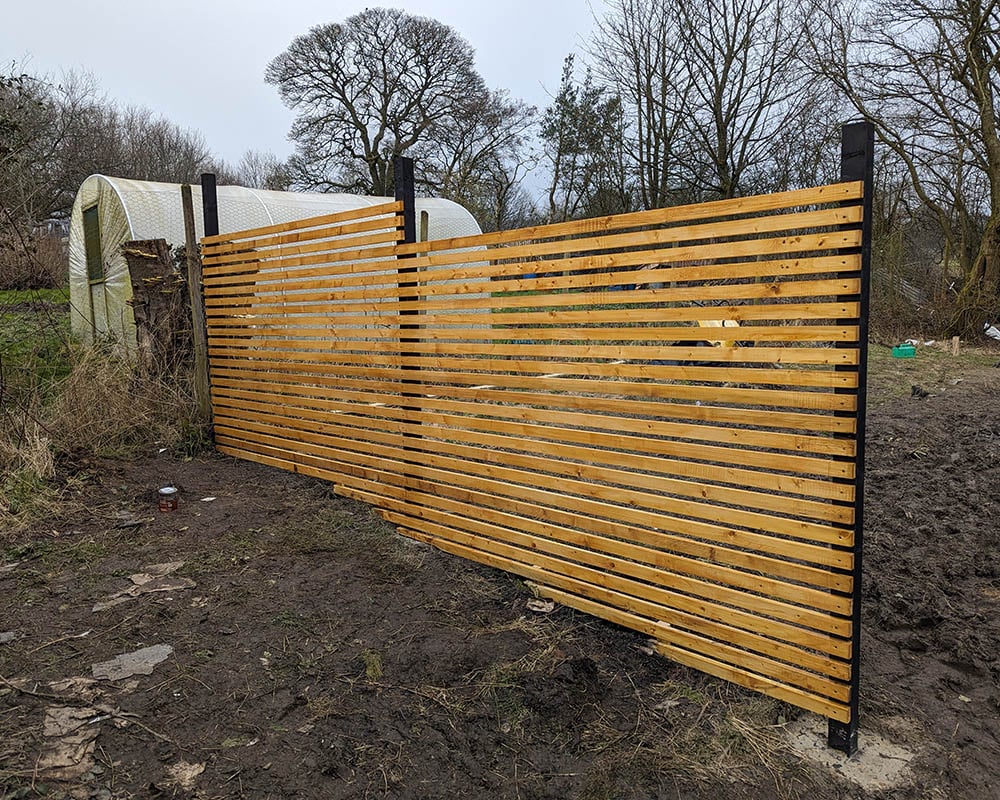
The striking look of this fence is used by attaching a load of horizontal batons all spaced evenly apart. This is actually a very simple job, but one that just takes a while.
We decided to start at the bottom and attach the batons as low as we could and then work our way up. As you can see in the photos we are on a bit of a slope so had to stagger the fence a little.
Use a spirit level to ensure your first baton is level. After this all you need is a spacer, we used an offcut from the batons but turned on its side. This meant our gap would be smaller than the baton.

You then just need to keep going like this using your spacer until the fence is to the height you want.
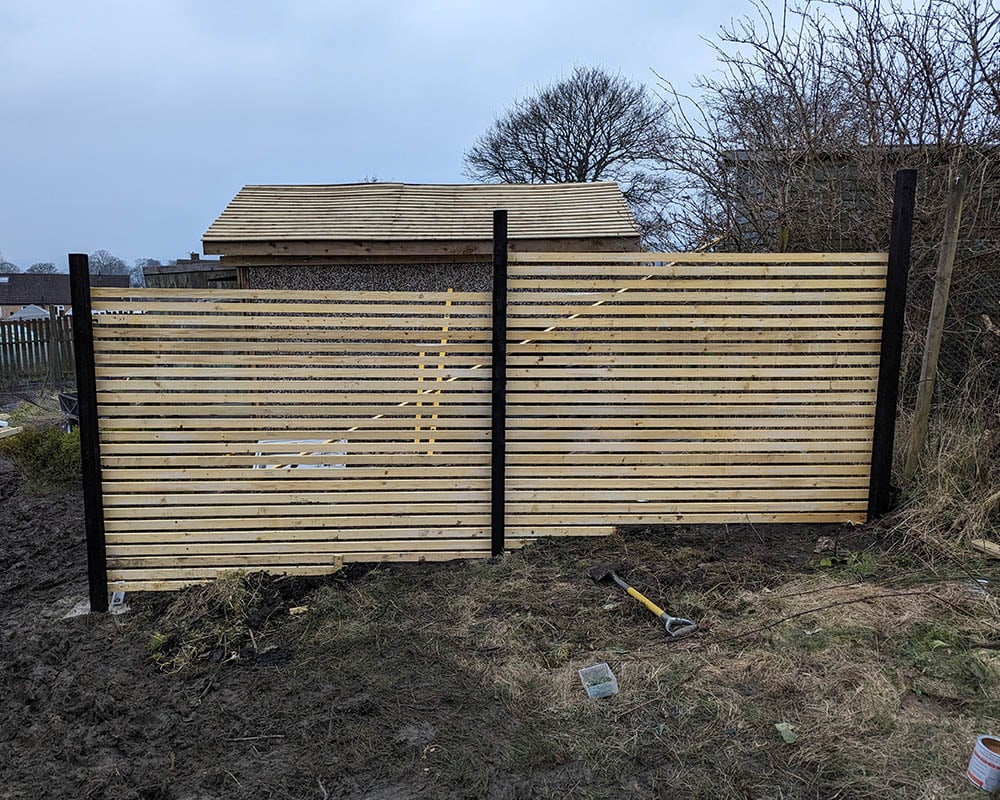
One thing I really like about this design is that, unlike a lot of fences, it looks just as nice from the back as it does from the front!
My design has a gap in the middle in which i will be building a pergola walkway to act as an entrance and also somewhere to grow vining crops over.
To line up the batons so that they all run in a horizontal line we used a large spirit level to bridge the gap.

Step 3 - Staining the fence
After the battens were attached i went and stained them all with a Ronseal natural oak stain. This was to give them a cedar look and also add some protection to the battens - although they are treated already.

Materials Used
- 25mm x 50mm (1" x 2") treated roofing battens - for the slats (4.6m long)
- 75mm x 75mm (3") treated posts 2.4m (8ft) tall
- Postcrete
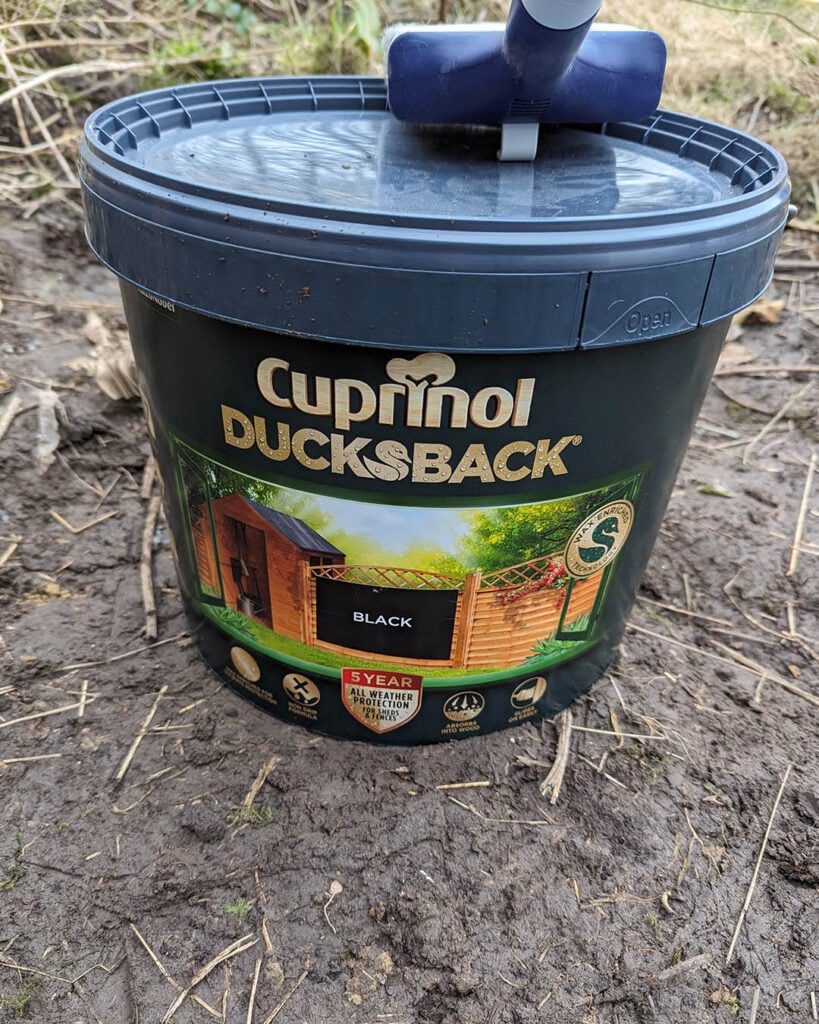
- Ducksback black fence paint
- Ronseal natural oak wood stain


Wendy S says
This looks like even I could do it! What a great idea- I’m bookmarking this to reference when I’m ready to put up a fence.
Daniel says
Thanks Wendy, I love how it turned out!
Robert stephens says
Whats the total cost £500 plus not a cheap fence price of wood has gone through the roof..
Daniel says
Posts were £5 each, Postcrete £3.60 a bag, roofing battens were around £4 a 4.8m length. So for that finished panel which is 4.8m wide it cost around £120