If you are looking for a really simple and easy way to build a raised bed quickly with just basic tools then this guide is for you.
This is a really simple but effective way of building raised beds using basic equipment. I will be using a drill, handsaw and some screws. Couple these tools with some decking boards and a piece of square timber and you have all you need to build some raised beds, let me show you how I did it.
Make A Raised Bed From Decking

Step 1 - Chop your square timber down into four
To start with we want to chop our square timber down into four equal pieces. This needs to be treated timber, by the way, normal timber would just rot too quick. Treated timber is easily available and B&Q and Homebase, it is usually kept outside with the garden stuff.
You can use timber stakes with a spike on if you would prefer, you can then hammer the stake into the ground to provide a little more support. I didn't find this necessary though and it is cheaper to just buy a length of wood. Once you have soil in the bed the weight of the soil keeps everything in place anyway.
For the height of these posts, you just want to match the height of your raised beds. I am building my bed two decking boards high. So I cut my posts down to this length.

Step 2 - Measure and cut your decking boards
Now we want to measure and cut our decking boards down to length. Use a tape measure, make a mark on your required length and then square this off to give you a straight line to cut to.

If you don't have a tape measure then don't fret. You can just lay one of your decking boards on the floor where the bed is going to be and make a mark on it at your desired length. You can then use this as a template to cut the other decking boards to.
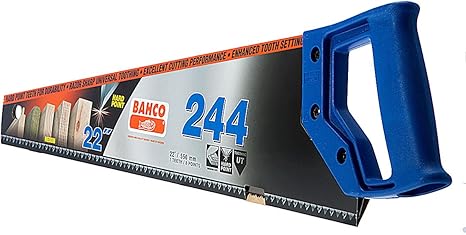
If you don't have a square then there is one little pro tip I am about to share with you. The handle of your hand saw will likely have a square built into it, just have a look.
Most saw handles are made in a way that when placed against the wood the metal part of the saw creates a square. Some also have a part that is angled at 45 degrees too!

You can use your thumb as a guide when starting the cut in order to keep it on your marked line.

Step 3 - Fasten decking boards to your posts
Now you simply screw the decking boards into the posts we sawed down earlier. Screw in from the front into the decking board then post. You want your screws to go well into the post to make sure it is well attached, just make sure you don't get screws that are too long and come out the back!

Hold the board and post with one hand and screw using your drill with the other. If you are struggling then fit a small drill bit to your drill and pre-drill two or three holes in the decking board where you want your screws to go. This will make the process a lot easier.

I used three screws just to help make sure it wasn't coming off but two, one at the bottom and one at the top will be fine. You don't want to put your screws in too close to the edge of either piece of wood as this will increase the chance of the wood cracking.
Step 4 - Repeat on the other side
Now you want to repeat this process on the other end of the decking plank. You then want to do the same thing over again with your two remaining posts. You should then have two identical decking boards like the photo below. These will be the long sides of our raised bed, although it really doesn't matter which way round you do it.

Step 5 - Cut down and attach your widths
Now you need to attach these to each other using two more cut down decking boards. These will decide the width of your raised bed. I made mine square but most raised beds tend to be made in a rectangular shape. This is up to you and this is one of the benefits of building your own raised beds, you get to decide the shape to best suit your garden and needs.

Now attach these to your posts in the same way as before. This will complete the bottom layer of your raised bed.
If you are just making your raised bed one decking board high then you are done now. If not and you are going higher then just repeat these steps until you reach the desired height.
Done
Now you are done with the building stage, you can see my bed at this same point below.

Now you need to fill it, but before you do there is something else to think about. Do you use a membrane or not.
Lots of people will advise you to use a plastic membrane behind the wood. This will help to keep the wood dry and make it last longer. This is true and it definitely will. The reason I am not using one is that I am trying to cut down on my plastic usage in the garden. Yes this raised bed won't last as long but that is a compromise I am willing to make, you come to your own decision on this.
You also want to do something about the bottom of the bed if you are going onto grass like I am here. If you do line your bed with plastic then you can line the floor too to keep weeds down. I prefer a more natural solution and line the bottom of my bed with plain brown cardboard.
This will kill off the grass that is underneath the bed, but over time it will rot away. This will then mean that my raised bed has a lot more depth than one with a plastic bottom. The roots of my plants will be able to reach into the soil below.
If you do use plastic I would advise putting some draining holes in otherwise you run the risk of creating a muddy pond!

If using cardboard like me then make sure you have plenty of overlapping and lay it a couple of rows deep if possible. If you leave gaps the grass will find its way through it.


Edna Moir says
I have made raised beds like this but I found an easier way by getting pallet collars. They can be stacked to a depth f 2 or 3 whatever suits you. I get them from a wood recycling place for a few quid each. You can also get them in B&Q etc but a lot dearer
John Pallas says
A bit of advice,, when fitting screws always put some grease or vaseline on screw to make it go in easier