
Are you looking to jump into the world of vegetable gardening? Then you are lucky you have found this complete guide to vegetable gardening for beginners.
It has everything I have learned over decades of growing vegetables, distilled into an easy-to-read and follow guide. You'll be growing tonnes of your own produce before you know it!
Step 1 - Location
Before you can start growing your own vegetables you need to choose a location for your new vegetable garden. For some of us, this could be a big decision, whereas others won't have any choice and only have one spot where they can start growing.
Even for those people though there are still plenty of decisions to be made, such as how you will layout your beds, which way you will orient them and so on and so forth.
Orientation
If you are growing in the northern hemisphere, then ideally you want to arrange your beds so that the longer side of the bed faces south. This means that you will have a much larger percentage of your crop getting direct sunlight, which will help everything grow.

Here you can see my beds laid out, all facing south so that I can maximise the amount of light my veggies are getting.
Now let me stress you don't need to layout your garden like this, but just be aware of orientation as you are planning it. You don't want to end up with an accidental north-facing garden, which will hamper your vegetables growth.
Shade
Next, you need to think about shade, the easiest way to find shady spots in your garden is to simply spend some time there and observe where the shade is at different times of the day.
Some vegetables will tolerate more shade than others, but generally speaking, most prefer more sun. (unless you are in a really hot area where they may suffer from sunburn, but this is a whole different kettle of fish!)
Step 2 - Raised or in-ground beds?
Now that you know where your beds are going to go you need to decide what style of garden beds you want. Do you want raised beds or are you just going to grow into the ground?
There is no one size fits all answer here and it is a very nuanced question. Raised beds will always be more expensive and you have to buy or build them and then fill them with soil/compost.
Raised beds I have always found to be easier to keep weed free and they do seem to make gardening a little easier as you're not always on your knees.
What I would suggest is starting with in-ground beds, see how that works and if you enjoy gardening. If you love it and want to keep going then you can slowly turn your in-ground beds into raised ones. This is what I did and it worked really well.
Starting your beds
Whether they are raised or in-ground you will need to get your beds started one way or another. I practise no-dig or no-till for you American readers. This is exactly what it sounds like, you try and avoid digging into your soil as much as possible. This promotes soil health and is a really good way to grow.
Starting a no-dig vegetable bed is actually really straightforward. You need to put some organic material down to stop weeds from coming through and then cover it with compost.
I used cardboard, which is what most people do, but other organic materials like wool can work well if you have access to them. You simply place your cardboard onto the ground, overlap it well and make sure there are no gaps, and then cover it with a thick layer of 5-10cm of compost.

You can still do this with inground beds too, just lay the cardboard on the ground and then cover with compost, no need to spend ours digging up your soil!
Step 3 - Starting Seeds
If you want to grow veggies and save money doing it then you will have to start them from seed. This is the most rewarding way to grow vegetables and makes growing your own much cheaper than buying it from the shops.
Sowing and growing seeds is different depending on the crop you are growing, where in the world you are, and what time of year it is. So let me talk a little about the different ways you can start seeds.
Direct Sowing
As the name suggests this is where you direct sow the seeds where they are to grow. This is suitable for tougher plants that don't need any special protection. It will normally say on the seed packet if they can be direct sown outside.
There are some important terms you may come across when direct sowing seeds so let me explain them a little.
Drill
Nothing to do with power tools, a Drill in terms of gardening is a shallow trench in the soil that you sow seeds into. Each dip on the photo below is a Drill.

You can make these with a stick, cane, finger or any blunt-ended tool. Just push it into the soil a little and scrape it along. You then place your seeds in the dips and brush the mounds of soil over the top to cover the seeds.
Broadcast Sowing
This is when you scatter seeds over a large area, you tend to only do this with really fast-growing crops like rocket. You don't need to grow them in regimented rows so you just scatter them over the area where you want them to grow.
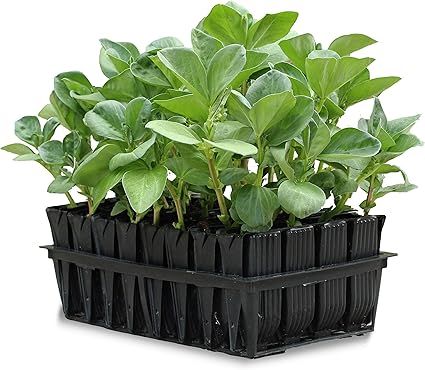
Starting in Trays
I like to start a lot of my seeds in seed trays, even ones which could be direct sown outside. The reason for this is that it simply allows you to protect your seedlings from pests.
Slugs can be a real problem for direct sown seeds, but if you start your seeds in trays before planting them out when they are bigger then they are much more likely to survive a slug attack.

A root trainer is a special kind of seed tray that opens up, allowing you to get your plants out without damaging the roots. I have a few of them now and absolutely love them.
Starting Undercover
You will often hear the phrase, start your seeds undercover, but what does this actually mean? Starting your seeds undercover just means sowing them in trays in a protected spot. This could be a greenhouse, polytunnel, cold frame or even inside your house.
Seeds are sown like this to give them an early start, it will be too cold to sow them outside so we start them early in a protected spot before moving them outdoors later on.
Planting Seeds Out
When the time comes to plant your seedlings out into the veg garden then you should take one simple precaution. This precaution is called hardening off.
This is where you get the seedlings used to the colder conditions outside before moving them out. I usually do it over a week and start by leaving the seedlings outside for a few hours during the day.
Overtime you extend the amount of time they are left outside before finally planting them out into their final spot.
This just gets the plants used to the cooler conditions outside and helps protect them against the shock of suddenly being moved outdoors.
Step 4 - Growing and Feeding
Now that your seedlings are out in the veg garden it is time to learn all about growing them and supporting and feeding them to maximise your harvest.
Supports
Some vegetables, particularly those that like to climb, will need to be supported during growth. The common veggies that need a bit of help are peas, beans, tomatoes and cucumbers. There are many more that need a little helping hand but these are the common ones.
The most common method for supporting vegetables as they grow is the classic bamboo cane. You stick these into the soil and your plants will grow up them. Some will need to be tied in and others will support themselves using their tendrils.
Often canes are formed into support structures like a wigwam or rows of canes are joined together.


Other plants such as tomatoes and cucumbers are often grown up a piece of string suspended above them.

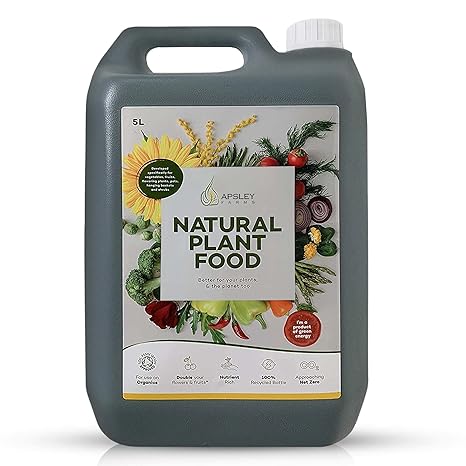
Feeding
Feeding plants is an important step if you want to get the most out of your plants. There are all sorts of different feeds available some, organic and some not. What you decide to use is up to you but I like to garden organically as I feel I am then getting even greater value out of my home-grown veggies.
N:P:K Rating
All fertilisers are given an N:P:K rating. This is the ratio of Nitrogen, Phosphorus and potassium in them.
Each of these different chemicals does something different to your plants and can be needed at different times in their life.
Nitrogen is responsible for leafy green growth and is usually applied when the plants are young. Later on, as your vegetables begin to create fruit too much nitrogen can be a bad thing as your tomato plant for example will put its effort into growing more leaves rather than tomatoes.
Phosphorus is responsible for the production of fruit and as such is very useful when your vegetables are starting to crop. This is why many tomato feeds have a high ratio of phosphorus.
Potassium is an all-around helper and promotes overall growth, it is good for balancing growth and having nice healthy plants.
I often just use an all-purpose vegetable feed and just apply it to everything, it keeps things nice and simple.
- All new natural formula
- Not just your average NPK liquid fertilizer
- Trialled and tested
- Soil Association Approved
- Organic
- By-product of green energy
- Contains macronutrients and beneficial microbes.
- Does smell a little
Soil Health
Soil health is very important when it comes to growing vegetables. Nice healthy soil will reward you with abundant harvests without the need for lots of fertiliser. But how do you go about getting nice healthy soil?
The most important factor you need is plenty of organic matter. Add compost if your soil is poor and really try to make your own. Composting can be really simple and really beneficial to your garden.
If you don't have the space to make your own then buy in good quality compost and maybe also think about practising chop and drop gardening or growing green manure.
Step 5 - Harvest
Now comes the good part, harvesting your crop. Many vegetables are very easy to harvest and will tell you when they are ready, but others are tougher to tell.
Take potatoes for example, as they are a root crop and the actual potato grows below ground how do you know when they are ready? With potatoes, you often wait until the above-ground growth starts to brown and die back and that's when you know they are ready.
This is a reasonably reliable rule of thumb but if you are growing something and are not sure when it is ready then just give it a quick Google. Odds are someone will have the answer, it might even be me!

This is just a beginner's guide to vegetable gardening and is meant to be surface-level knowledge. The most important thing, I believe at least, is to just get stuck in and not be afraid of failure. Even after years of growing I still have some crops which are complete failures, but every year I try again!
If you have something you are struggling with or would like to know then why not leave me a comment down below?


Leave a Reply