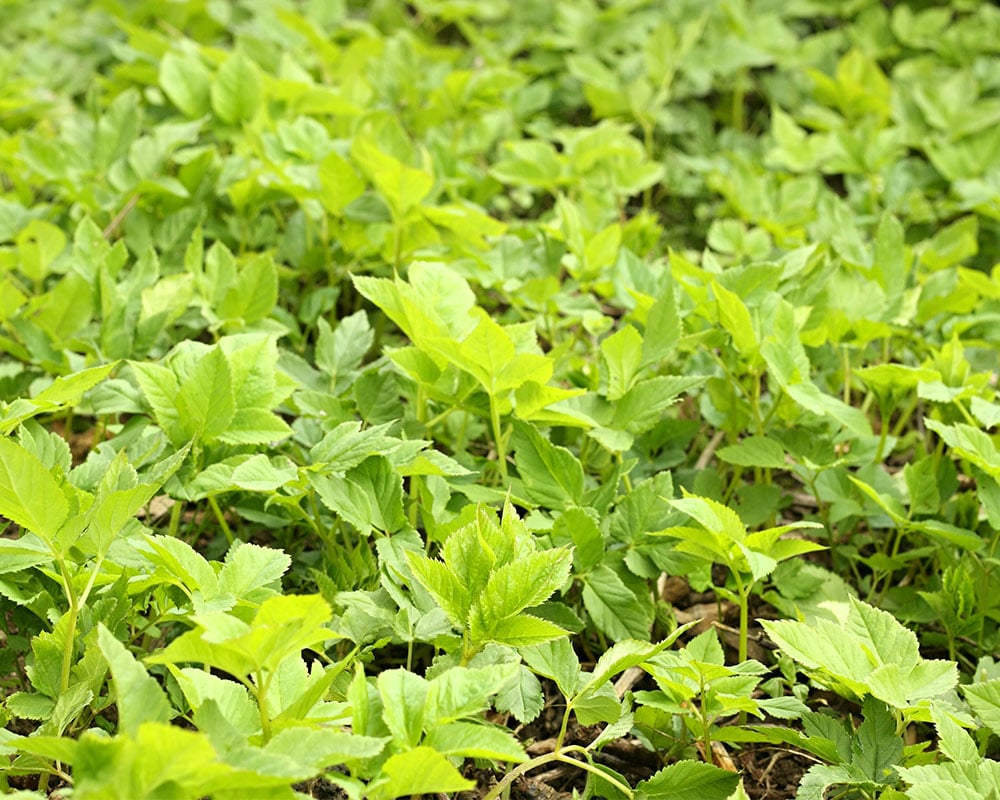
Ground elder is a weed that even experienced gardeners respect, though they don’t love it. It looks harmless with its fresh green leaves and pretty white flowers in summer. But under the soil, it’s quietly spreading.
If you have ground elder, you know how tough it is. You dig it out, but it always comes back. Maybe you’ve even given up on a whole border. You’re not alone.
I’ve been fighting ground elder in my own garden for years and have learned what actually works. You can get rid of it, but it takes time and the right methods. A lot of advice online doesn’t help or can even make things worse.
I prefer organic methods, so I’ll start with those. Later, I’ll talk about chemical options and their pros and cons, so you can choose what’s best for you.
Quick History (It’s Actually Interesting)
Ground elder (Aegopodium podagraria) came to Britain with the Romans. They didn’t see it as a weed but as a vegetable. They grew it, ate the young leaves like spinach, and used it as a gout remedy. The Latin name, podagraria, reflects this.
Later, it was cultivated in monastery gardens. That’s why it’s also called bishop’s weed or goutweed. Eventually, it escaped and has been a headache for gardeners ever since.
The young spring leaves are still edible and can be cooked or added raw to salads. I’ve never tried it; eating my enemy feels strange. If you want to harvest it, do so before it flowers; after that, the leaves turn bitter.
How It Spreads (And Why You Can’t Just Pull It Up)
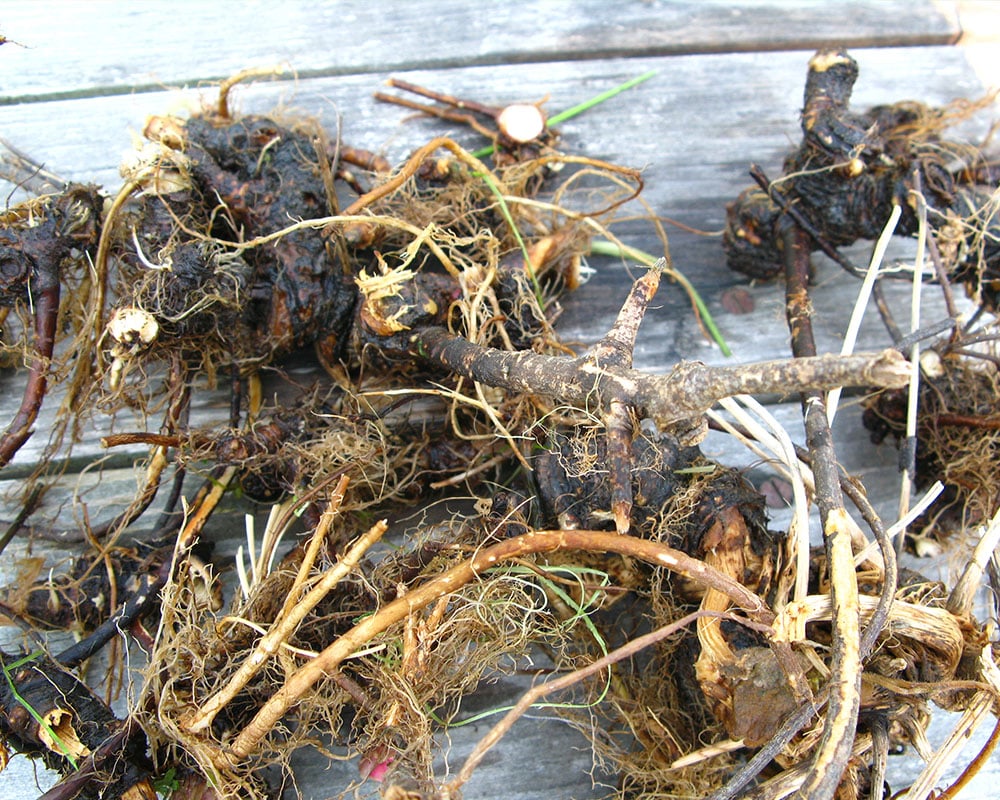
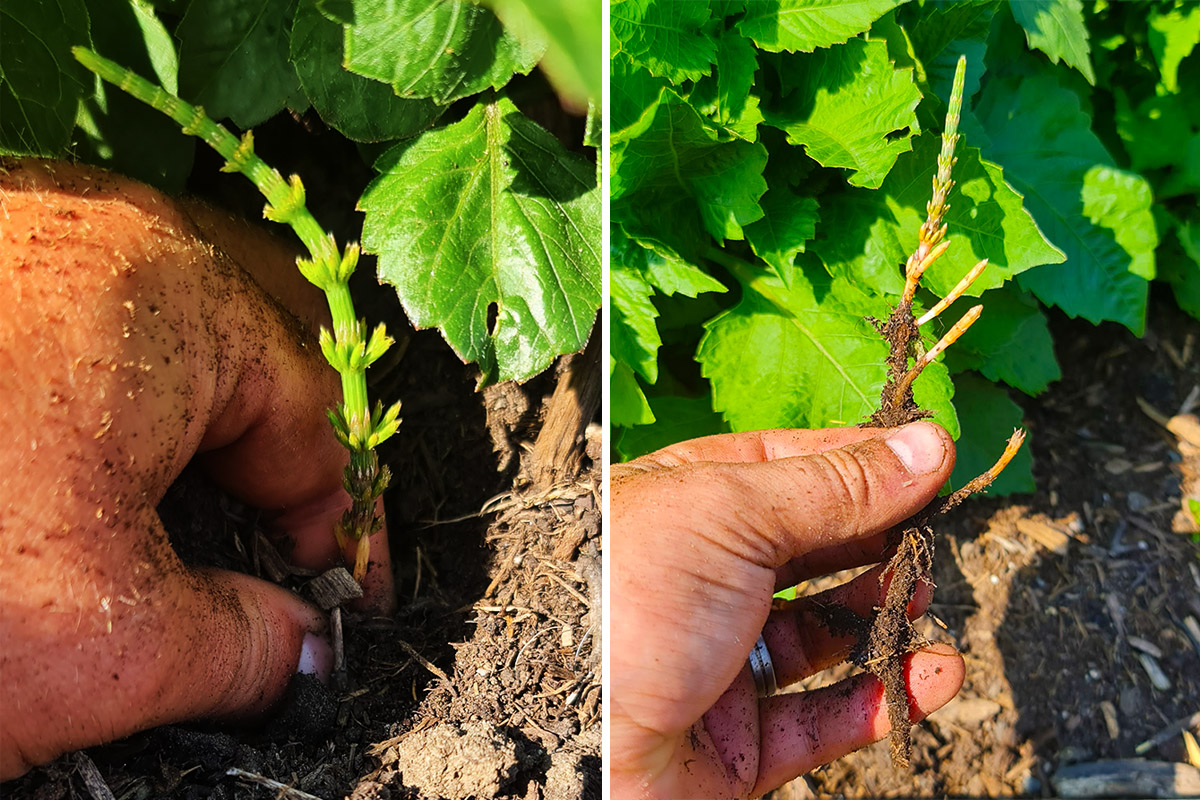
Ground elder spreads in two ways: by seed (a minor issue) and by underground rhizomes (the real problem).
The rhizomes, which are the white, fleshy stems, are the real problem. They sit just below the surface, usually in the top 4 to 6 inches of soil, and spread fast. One plant can send roots out 2 metres in a season. Even a piece of rhizome bigger than your fingernail can grow into a new plant.
That’s why digging actually makes things worse. When you cut up the rhizomes, you end up with more plants. Hoeing (deeply) and tilling have the same effect. Anything that breaks the rhizomes into smaller pieces helps the weed, not you.
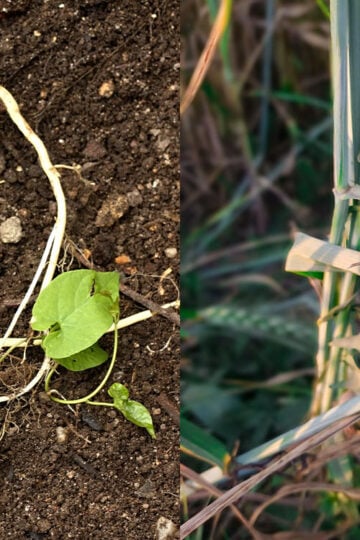
Bindweed has a similar problem, but ground elder might be even worse. Bindweed climbs, so it’s easier to spot and remove. Ground elder spreads low to the ground, weaving its rhizomes among the roots of your favorite plants. By the time you see it, it’s already tangled around your hostas and roses.
The Organic Methods That Actually Work
The main idea is to starve the roots. Ground elder needs its leaves to make food for the rhizomes. If you keep cutting off the leaves, the rhizomes get weaker and eventually die.
This method works, but you have to stick with it.
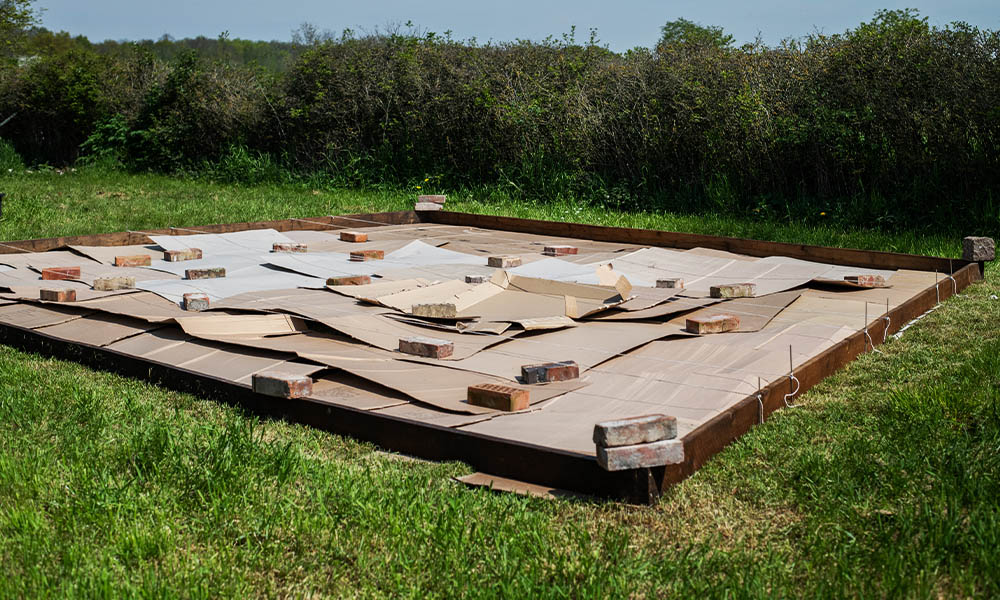
1. Smother It With Cardboard And Mulch (My Top Pick)
This is the method that has worked best for me, and it’s also the RHS’s top organic recommendation. It’s ideal for clearing an entire bed before replanting or for spots you can leave alone for a season.
Cut the top growth as low as you can with shears or a strimmer. Cover the area with heavy cardboard; flattened delivery boxes work well. (Black plastic works even better but I know not everyone wants to use even more plastic in the garden.) Overlap the cardboard by at least 6 inches to block out all light. Then add a thick layer of mulch, about 8 inches of bark chips, wood chips, well-rotted manure, or garden compost. The thicker the layer, the better.
The cardboard blocks out the light. The rhizomes send up new shoots, but they only find darkness. Eventually, they run out of energy and die off.
Leave the covering in place for at least a year, though two years is even better. (If using cardboard, then dont worry about removing it as it will just rot away.) The RHS recommends 12 to 18 months, and I agree. You’ll need to add more mulch as it breaks down. You can plant through the mulch while you wait; new plant roots can grow through it, but ground elder rhizomes can’t.
It’s important to cover the whole area with no gaps. Ground elder will find any uncovered spot. Pay special attention to the edges of beds and around tree trunks. Even a small 6-inch gap can let the rhizomes come back within a season.
2. Cut It Down Every 7 to 10 Days
This method is for areas you can’t smother, like ground elder growing among perennials you want to keep.
Whenever you spot a ground elder shoot, cut it at soil level with a sharp knife or scissors. Don’t pull or dig, just cut. Throw away the leaves; don’t leave them on the ground, since even a small piece can grow back.
You’ll need to do this every 7 to 10 days from March to October. If you skip a week, the rhizomes will recover. The plant uses stored energy to send up new shoots. If you remove each shoot before it grows enough leaves, the rhizomes get weaker.
For a bad infestation, this method takes at least 3 years. It’s not easy, but it’s the only way to deal with ground elder around plants you can’t move. On the bright side, you can do it while having a cup of tea on a Sunday morning.
3. The Nuclear Option: Lift, Wash, and Replant
This method, which is a classic from BBC Gardeners’ World, works but takes a lot of effort. It’s best to do it in autumn or early spring when your border plants are dormant.
Dig up every plant in the affected border. Rinse the soil off their roots with a hose. Carefully tease out every ground elder rhizome from the root ball. This is fiddly work, so be patient. Pot the cleaned plants temporarily.
Next, dig over the empty bed and remove every piece of root you can find. Don’t cut corners, because even a 1-inch piece will grow back.
Replant the cleaned plants. For the next 2 years, watch closely for any regrowth and pull or cut every shoot as soon as you see it.
This method works, but it will take you a whole weekend for each border. It’s a tough job, and you’ll have earned a glass of wine when you’re done. It’s not for the faint-hearted.
4. Mow It Out Of Lawns
If ground elder is in your lawn, you’re in luck. Regular mowing keeps it from surviving. Mow once a week during the growing season, and ground elder should be gone in 2 to 3 years.
This can be a good strategy. If you have a bad infestation in part of your garden, lay turf over it and mow for a few years. You’ll have a usable lawn while the ground elder dies off. Later, you can dig up the lawn and bring back your borders if you like.
5. Plant Densely and Fight Back
Ground elder can handle shade, but it doesn’t do well in crowded areas. After you clear a patch, fill it with strong perennials. Hardy geraniums, hostas, lady’s mantle, ferns, and other dense plants will do the job.
This method won’t get rid of ground elder completely, but it makes it much harder for it to come back. Ground elder loves bare soil, so dense planting helps keep it away.
6. Stop It Coming In From the Neighbours
If ground elder is coming in from next door, you’ll need to deal with the source. Try having a friendly chat with your neighbour. You could offer to help or split the cost of a barrier.
If that doesn’t work, think about putting a vertical barrier along the boundary. A bamboo root barrier or a thick plastic sheet buried 18 inches deep can help. This depth is important because, even though ground elder roots are shallow, the rhizomes can go deeper.
Things That Don’t Work (Don’t Bother)
Vinegar. It burns leaves but doesn’t kill rhizomes. Ground elder returns in two weeks. The RHS advises against it.
Boiling water. It might help between paving slabs, but it won’t solve a ground elder issue in borders.
Salt. Avoid it. It poisons the soil for years and won’t kill deeper rhizomes.
Burying potatoes is a popular idea on social media, but there’s no evidence it works. Save your potatoes for dinner instead.
Hoeing or rotavating only make things worse by chopping up the rhizomes and creating more plants. Don’t disturb the soil unless you’re ready to remove every piece by hand.
Don’t add live ground elder rhizomes to your home compost. Most compost piles don’t get hot enough to kill them, so you’ll just spread the weed with next year’s compost. Instead, throw them in the bin, take them to council green waste recycling, or seal them in a black bag for a year before composting.
The Chemical Option: Glyphosate
Let’s be honest. Like bindweed, glyphosate is the only chemical that reliably kills ground elder. You might know it as Roundup, but it’s also sold as Resolva, Gallup, Doff, and Rootblast. It’s a systemic
Glyphosate is legal for home gardeners in the UK until 15 December 2026, while a safety review is underway. There will be a public consultation in summer 2026, and a final decision by the end of the year. It could be renewed, restricted to professionals, or banned. Some campaign groups want amateur sales banned no matter what. If you plan to use it, the next 6 to 12 months might be your last chance, although nothing may change.
If You Use It - How to Do It Properly
Spray ground elder when it’s actively growing, typically from June to August. The plant should be 8 to 12 inches tall with full leaves. Avoid spraying on windy days or if rain is forecast within 6 hours.
The challenge with glyphosate is that ground elder often grows near desirable plants. Many gardeners mistakenly spray and damage their roses, making the cure worse than the disease.
To avoid this, you can paint glyphosate concentrate directly onto the ground elder leaves with a sponge brush. This method is slow but precise. Another option is to make a shield: cut a hole in a piece of plastic sheeting, slide it over the ground elder, and then spray. Be sure to protect nearby plants.
One application usually isn’t enough. Plan for 3 to 4 applications over 2 growing seasons. The rhizomes are extensive, so one spray often only kills top growth, leaving deeper roots intact.
The Pros
- It works. Glyphosate is the most effective single chemical option for ground elder.
- It’s faster than organic methods. You can clear a bad patch in 2 seasons instead of 3 to 5.
- It’s inexpensive. A bottle of concentrate costs about £10–15 and lasts a long time.
- When used carefully, by painting it on instead of spraying widely, glyphosate can be a precise tool.
The Cons
- The World Health Organization classified glyphosate as “probably carcinogenic” in 2015. Although this is debated, the uncertainty makes me hesitant to use it near food plants.
- It harms soil life, including earthworms, bacteria, and other microorganisms that are important for healthy soil. As a no-dig gardener, that’s a deal-breaker for me.
- It can harm bees and other pollinators.
- Spray drift on a windy day can damage desirable plants.
- Ground elder growing through other plants makes clean spraying difficult. You will damage nearby borders unless you paint it on individually.
- Multiple applications are needed. It’s not a one-time solution.
What I Actually Do
I choose not to use glyphosate. Since I grow vegetables, I prefer to keep my soil healthy by using no-dig methods.
My approach to ground elder is to use cardboard and mulch on the worst areas, which I cleared in 18 months, and to cut weekly in spots where I can’t move the plants. It’s a slow and steady process, but after about 3 years, the worst part of my garden went from a ground elder jungle to clean, plantable soil.
If you’re willing to put in the effort, organic methods do work. They just take longer than chemicals. I don’t judge anyone who chooses glyphosate; it’s legal, effective, and I get why people use it. Still, I think the smother method is best for most gardens, especially if you are growing food crops nearby.
The Bottom Line
Ground elder is one of the worst weeds in UK gardens, but it’s not unbeatable. Choose the method that suits your garden and patience:
- Worst patch you can clear completely? Use cardboard and mulch for 18 months.
- Border with plants you want to keep? Cut weekly for 3 years, or lift-and-wash if you’re feeling brave.
- Bad infestation in a section you can sacrifice? Lay turf and mow for 2 to 3 years.
- Prepared to use glyphosate? Paint it on the leaves in summer and repeat for 2 seasons.
No matter what method you choose, don’t dig, hoe, rotavate, or compost ground elder. These four mistakes will only make your ground elder problem worse.
Barbara Morley says
On the odd occasion when I have used glysophate. I found that cutting the bottom off a large plastic pot....placing it over the leaves of ground elder......restricts the spray.....concentrating the spray into the leaves.and .leaving the pot in place until the leaves dry......
Deborah Shepherd says
I fully agree with your methods. Until have ground elder everywhere over a large garden. I find covering with leaves really effective in suppressing growth. If leaves appear they can sometimes be routed out by hand because they are starved of moisture and light.
I am keen to which plants are able to fight the fight in a border. Agapanthus is really good as are day lilies. Roses survive but need help. Do you have any other suggestions?
Daniel says
Hardy geraniums can do very well and actually bully it back!
VK says
You can mix glyco with wallpaper paste which can then be painted on and remove the risk of dripping. This also means you can mix tiny batches. No waste and less chemicals. You can buy a mini tub of wallpaper paste and it’ll stay fresh in a cupboard.