Growing your own vegetables can be a rewarding and enjoyable experience. One of the key steps to ensuring a successful harvest is starting your vegetable seeds indoors. This process allows gardeners to get a head start on the growing season and protect their young plants from unpredictable early spring weather.
When done properly, indoor seed starting allows you to control the growing environment, giving you a crucial head start - meaning you'll enjoy your home-grown produce sooner than ever!
Equipment
When it comes to starting seeds inside, there is lots of different equipment available. Wether you need it or not depends on the seeds that you will be growing.
Heated Seed Mat
A heated seed mat is a thin plastic mat you put under your seed trays. It warms the soil to a consistently warm temperature of around 20 celsius. This helps speed up germination with heat-loving plants like peppers and tomatoes. This is the heated seed mat I use.
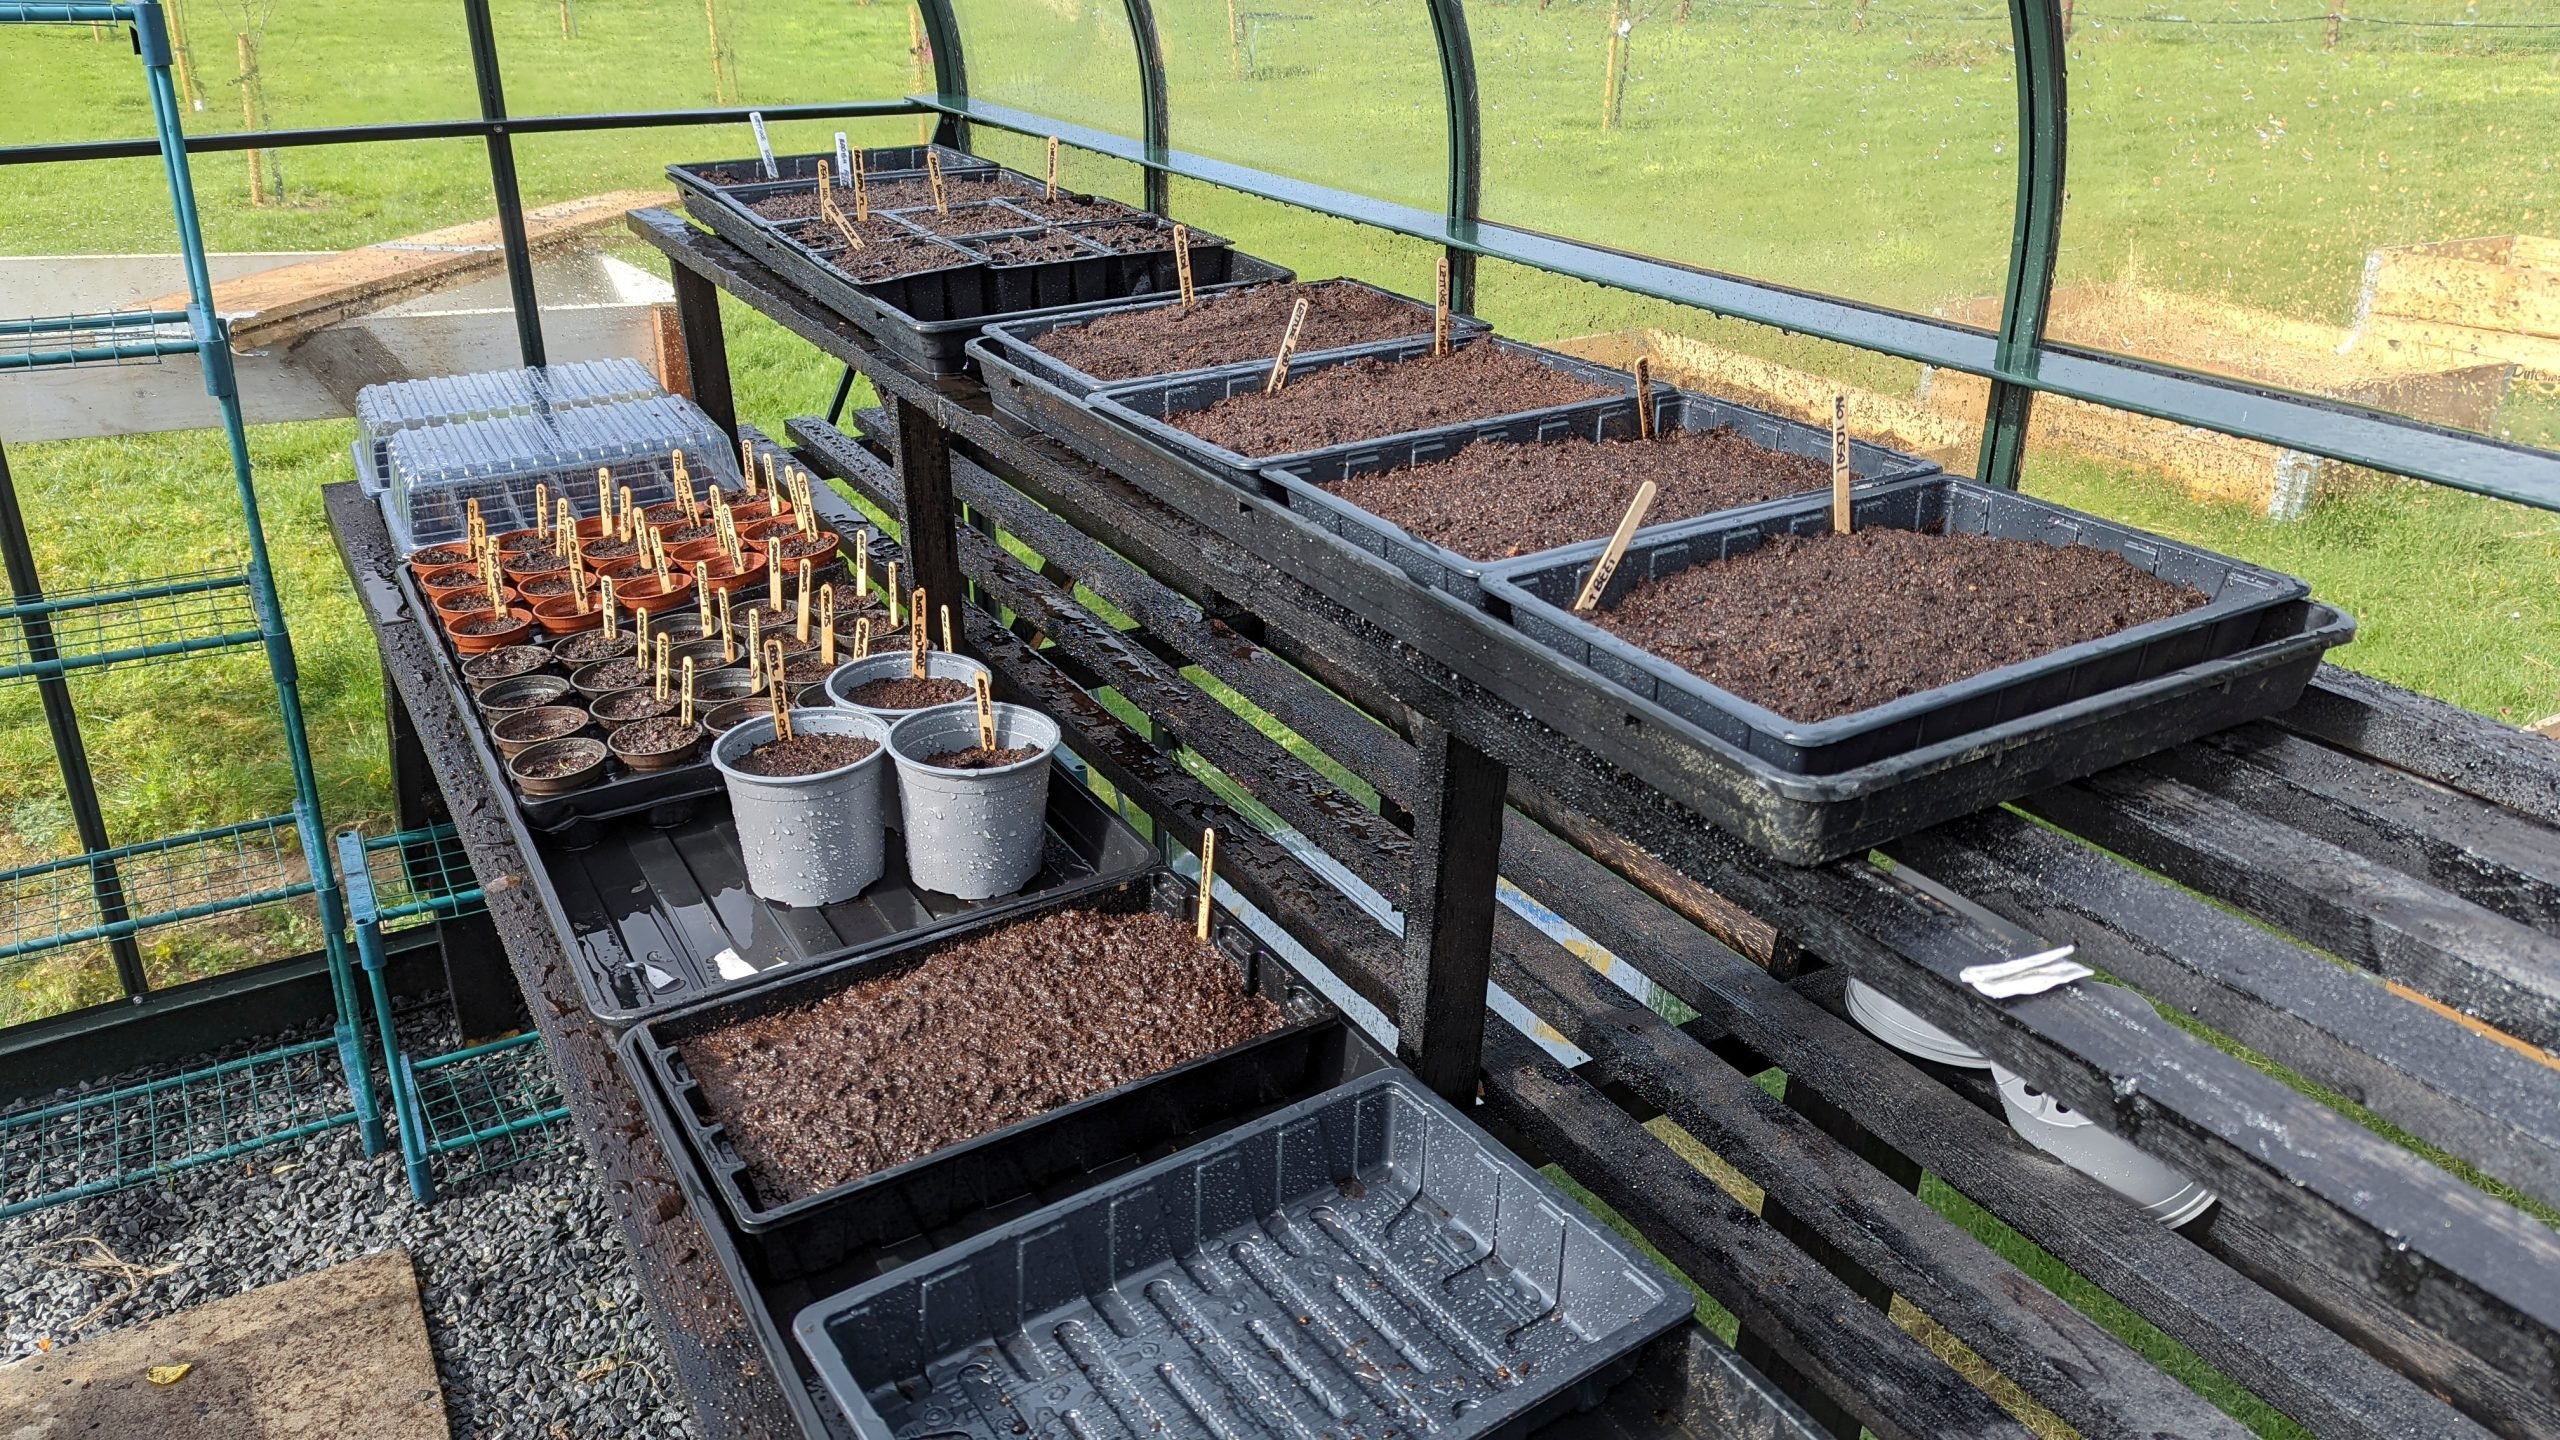
Module Trays
These are just large trays of individual "modules" into which you sow your seeds. I like using root trainers for many of my seeds as they allow for easy transplanting.
Propagator
A propagator is a seed tray with a clear plastic lid, in essence, a miniature greenhouse. This helps control humidity and speed up the germination of many seeds. You can make DIY propagators using milk bottles.
Heated Propagator
This is a mix between a propagator and a heated seed mat. The propagator is heated itself so you don't need to add a mat. I use a windowsill propagator, these are long and thin and designed to fit onto windowsills.
Grow Lights
For me, grow lights are an essential part of sowing seeds indoors, particularly early in the year. These LED lights give your seeds all the light they need and prevent leggy seedlings. These are the ones I use.
Sowing Seeds Indoors
Starting vegetable seeds indoors can significantly increase your growing season and improve the success of your garden. This section will discuss how to sow seeds properly, covering topics such as planting depth and spacing, moisture management, and labelling the containers.
Compost
When it comes to sowing seeds, I just use good old regular multi-purpose compost. I never have any issues with this, and while seed compost is a thing its benefits are limited, and if you have any spare, then you can't use it for growing plants, but not so with multi-purpose compost.
Seed compost is usually finer and often has less nutrition than a multi purpose compost.
When growing plants indoors in regular compost, you can have issues with gnats as normal compost isn't sterilised. Though I have never found this to be an issue with seedlings, I don't think they are indoors long enough for it to become an issue.
You can always sterilise your own compost by microwaving it, but this is a little time-consuming.
Planting Depth and Spacing
Different seeds like to be planted in different ways. Some on the surface, some buried deep. The best way to find out how to sow your seeds is to check the packet. If you can't find the info there then Google is your friend!
Small seeds, such as lettuce and tomatoes, can be sown on the surface and lightly covered with soil, while larger seeds, like beans and peas, can be planted about an inch deep.
Then there is also spacing, some seeds require lots of space while others can be crowded in. Again check the seed packet for specific spacing recommendations.
As you grow more and more crops and grow as a gardener too you will pick up your own tips and tricks and may find yourself ignoring the recommendations. I personally like to sow onions in clumps, but the packet would often tell you to space them out. This is one of those things that comes with time and experience. But, if you are just starting out you won't go far wrong by simply following the instructions on the packet.
With larger seeds like cucumbers, melons and squash, I plant them directly into pots, one per pot, so I don't have to pot them on immediately. These larger seeds quickly produce large seedlings that outgrow modules almost immediately.
Moisture Management
Maintaining the right moisture level in your growing medium is critical for seed germination. Seeds need consistent moisture to start germination, but overly wet conditions can cause seeds to rot. The ideal growing medium should be damp but not soaking wet.
Check on the seeds daily and water them as needed to maintain a consistently moist environment. Using a plastic cover can help retain moisture until germination occurs.
While your seedlings getting too wet can lead to issues like root rot they will also suffer and can die quite quickly if they get too dry. Getting the balance right is essential.
Labelling the Containers
Labeling your containers when you sow seeds indoors is crucial, especially if you're growing multiple varieties of plants. Proper labeling helps you keep track of each plant variety and makes transplanting seedlings outdoors more manageable.
When creating labels for your containers, include key information such as the vegetable type, variety, and sowing date. I use plastic T-shaped labels so you can fit more information on. Use a pencil or garden marker pen to write on your labels. I used to use a sharpie, but they fade very quickly in the sun, and soon you are left with no idea what you are growing. The best marker I have found is the Elixir Gardens Artline Garden Marker.
Providing Optimal Growing Conditions
Temperature Control
Most seeds will germinate just fine at your standard room temperature while a few might prefer a little extra heat (chillis for example). Use a heat mat to maintain the desired temperature or use a heated propagator for these seeds. Just a quick note here - pretty much everything will germinate at room temperature, but seeds like chillis will get there quicker with a little extra heat.
Some seeds will only germinate in cooler conditions and a heated propagator would actually be detrimental, so check the seed packet or look up the plant you are growing before you sow.
While this can sound overly complicated, most seeds will germinate just fine in a heated home. A nice 16-18 room temperature usually is enough for them to spring into life.
Light
Providing adequate light is essential for healthy seedling growth. Place seed trays near a sunny window, or use artificial light sources such as fluorescent tubes or LED grow lights.
This is the main problem that people run into when starting seeds indoors. This is particularly true in late winter and early spring, when our days are short. Even the sunniest windowsill won't get enough light simply because of the short days.
That is why I highly recommend indoor grow lights for early seed starting. If you do have leggy seedlings, then this article is for you.
You may think you need an expensive plant-specific grow light to germinate your seeds, but in reality, any light will do. Light is light and while some artificial lights may not provide the full spectrum that the sun does your plants will still germinate just fine. This becomes more of a problem when you are trying to get a crop out of your plants under artificial light.

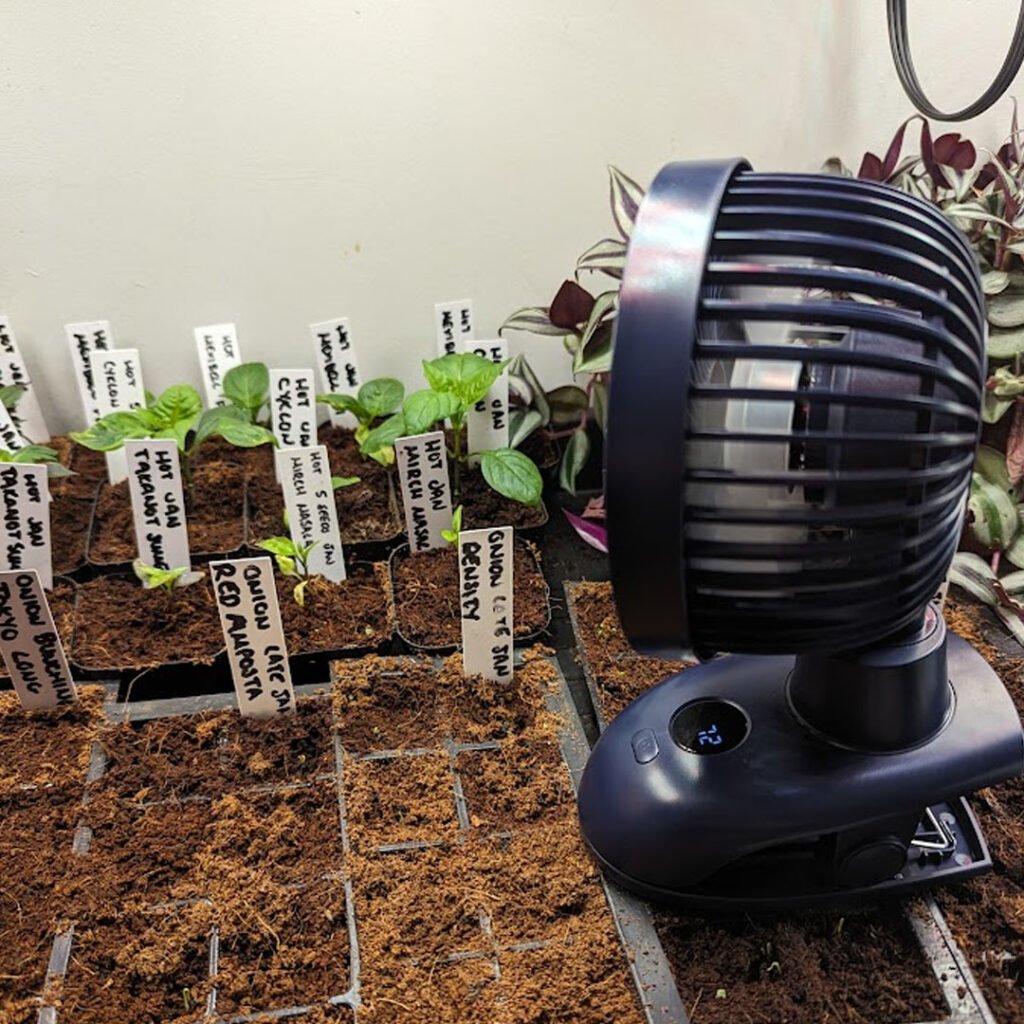
Ventilation and Air Circulation
Promoting air circulation and ventilation helps prevent mould and fungal diseases. Use a small fan to circulate air around the seedlings and ensure proper ventilation in the room. Proper air circulation also helps to strengthen the seedlings' stems by simulating outdoor wind conditions.
While this is advised as a best practice, it is not essential. It helps dry the top layer of soil out and strengthen stems but if you don't do it then by following the rest of this guide you will still produce healthy seedlings.
Monitoring Growth and Progress
Germination and Emergence
Germination and emergence are the first stages of your vegetable seeds' journey indoors. Keep an eye on the moisture, temperature, and humidity to ensure proper germination conditions.
You will often see a tiny white hairy root appearing first before anything else, this is the first sign of success so enjoy it!
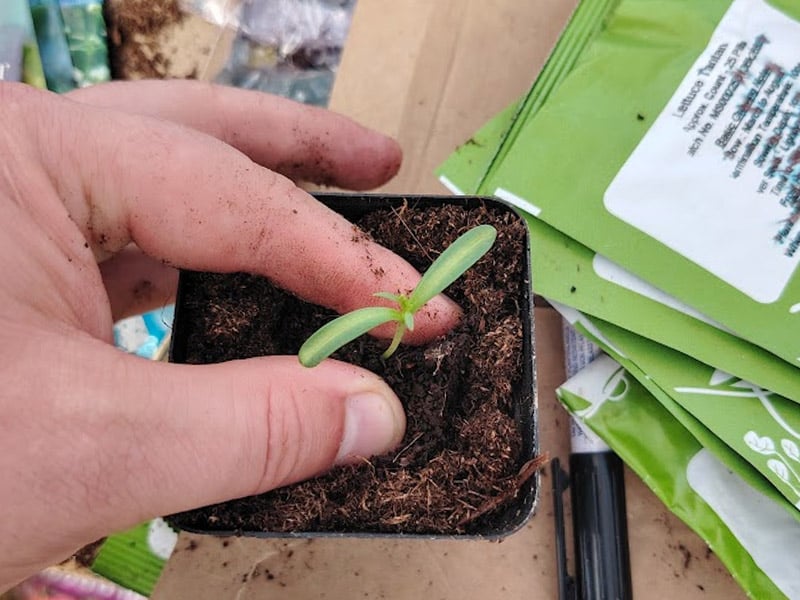
Seedling Development
As seedlings push through the soil's surface, they have their seed leaves, properly known as "Cotyledons". These are not actually proper leaves but help the seedling establish itself.
The next set of leaves to form is known to gardeners as "the first true leaves".

Thinning and Potting Up
Thinning is essential when multiple seedlings emerge in a single pot or cell. Remove weaker seedlings to prevent overcrowding and competition for resources. Typically, you should thin seedlings when they develop their first set of true leaves.
Potting up, or transplanting seedlings to larger containers, should be done when they outgrow their current pots. This ensures that their roots have more room to grow and prevents root-bound issues.
Hardening Off and Transplanting
Preparing for Outdoor Conditions
Hardening off is crucial before transplanting your indoor-grown seedlings to the garden. This process helps the seedlings adjust to outdoor conditions, reducing the risk of transplant shock and heat stress. To harden off your seedlings, gradually expose them to outdoor conditions for 7-10 days, increasing the time they spend outside day by day. Put them out during the day but ensure they are back indoors overnight in case of frosts.
Choosing the Ideal Transplanting Time
Selecting the right time for transplanting your seedlings is vital to ensure their successful growth. Depending on the vegetable type, you should transplant seedlings after any risk of frost has passed and the soil has warmed up adequately. Transplanting at the right time ensures that cold temperatures or frost will not damage your seedlings.
Troubleshooting Common Seedling Problems
Damping-Off and Fungal Infections
Damping-off is a disease caused by several types of fungi that affect seedlings, leading to their collapse and eventual death. To prevent damping-off, ensure that your seedling trays or pots are clean, well-draining, and the soil is not consistently wet. Avoid overwatering and maintain good ventilation around your seedlings.
Leggy Seedlings
Leggy seedlings are tall, thin, and weak due to insufficient light or sometimes excessive warmth. To prevent leggy seedlings, provide adequate light by placing seedlings under a grow light. Maintain a moderate temperature and avoid overcrowding, ensuring proper space between seedlings.

Poor Germination
Poor germination can result from various factors, such as old seeds, improper storage, inadequate moisture, or seeds planted too deep. To improve germination rates:
- Use fresh, properly stored seeds
- Plant seeds at the recommended depth
- Ensure consistent soil moisture without overwatering
- Maintain proper soil temperature
Additionally, some seeds may require soaking, scarification, or stratification to improve germination. Refer to the seed package instructions or research the specific requirements for the type of seeds you're growing.
Conclusion
In summary, starting vegetable seeds indoors is beneficial for most gardeners, allowing for a head start on the growing season and better control over germination conditions. When starting seeds indoors, it's essential to provide the plants with adequate light, water, and a stable environment.
Let me know in the comments below if you have any of your own top tips for success!
Good luck with your seedlings,
Daniel
Leave a Reply